How to Build an SEO AI Agent for Slack that works with Google Search Console & GA4 Data

Daniel has 25+ years SEO experience & loves everything SEO including testing, ranking & getting clients results
Can you imagine having your own SLACK team member who can constantly monitor your Google search console and google analytics data?
What about an AI agent that can:
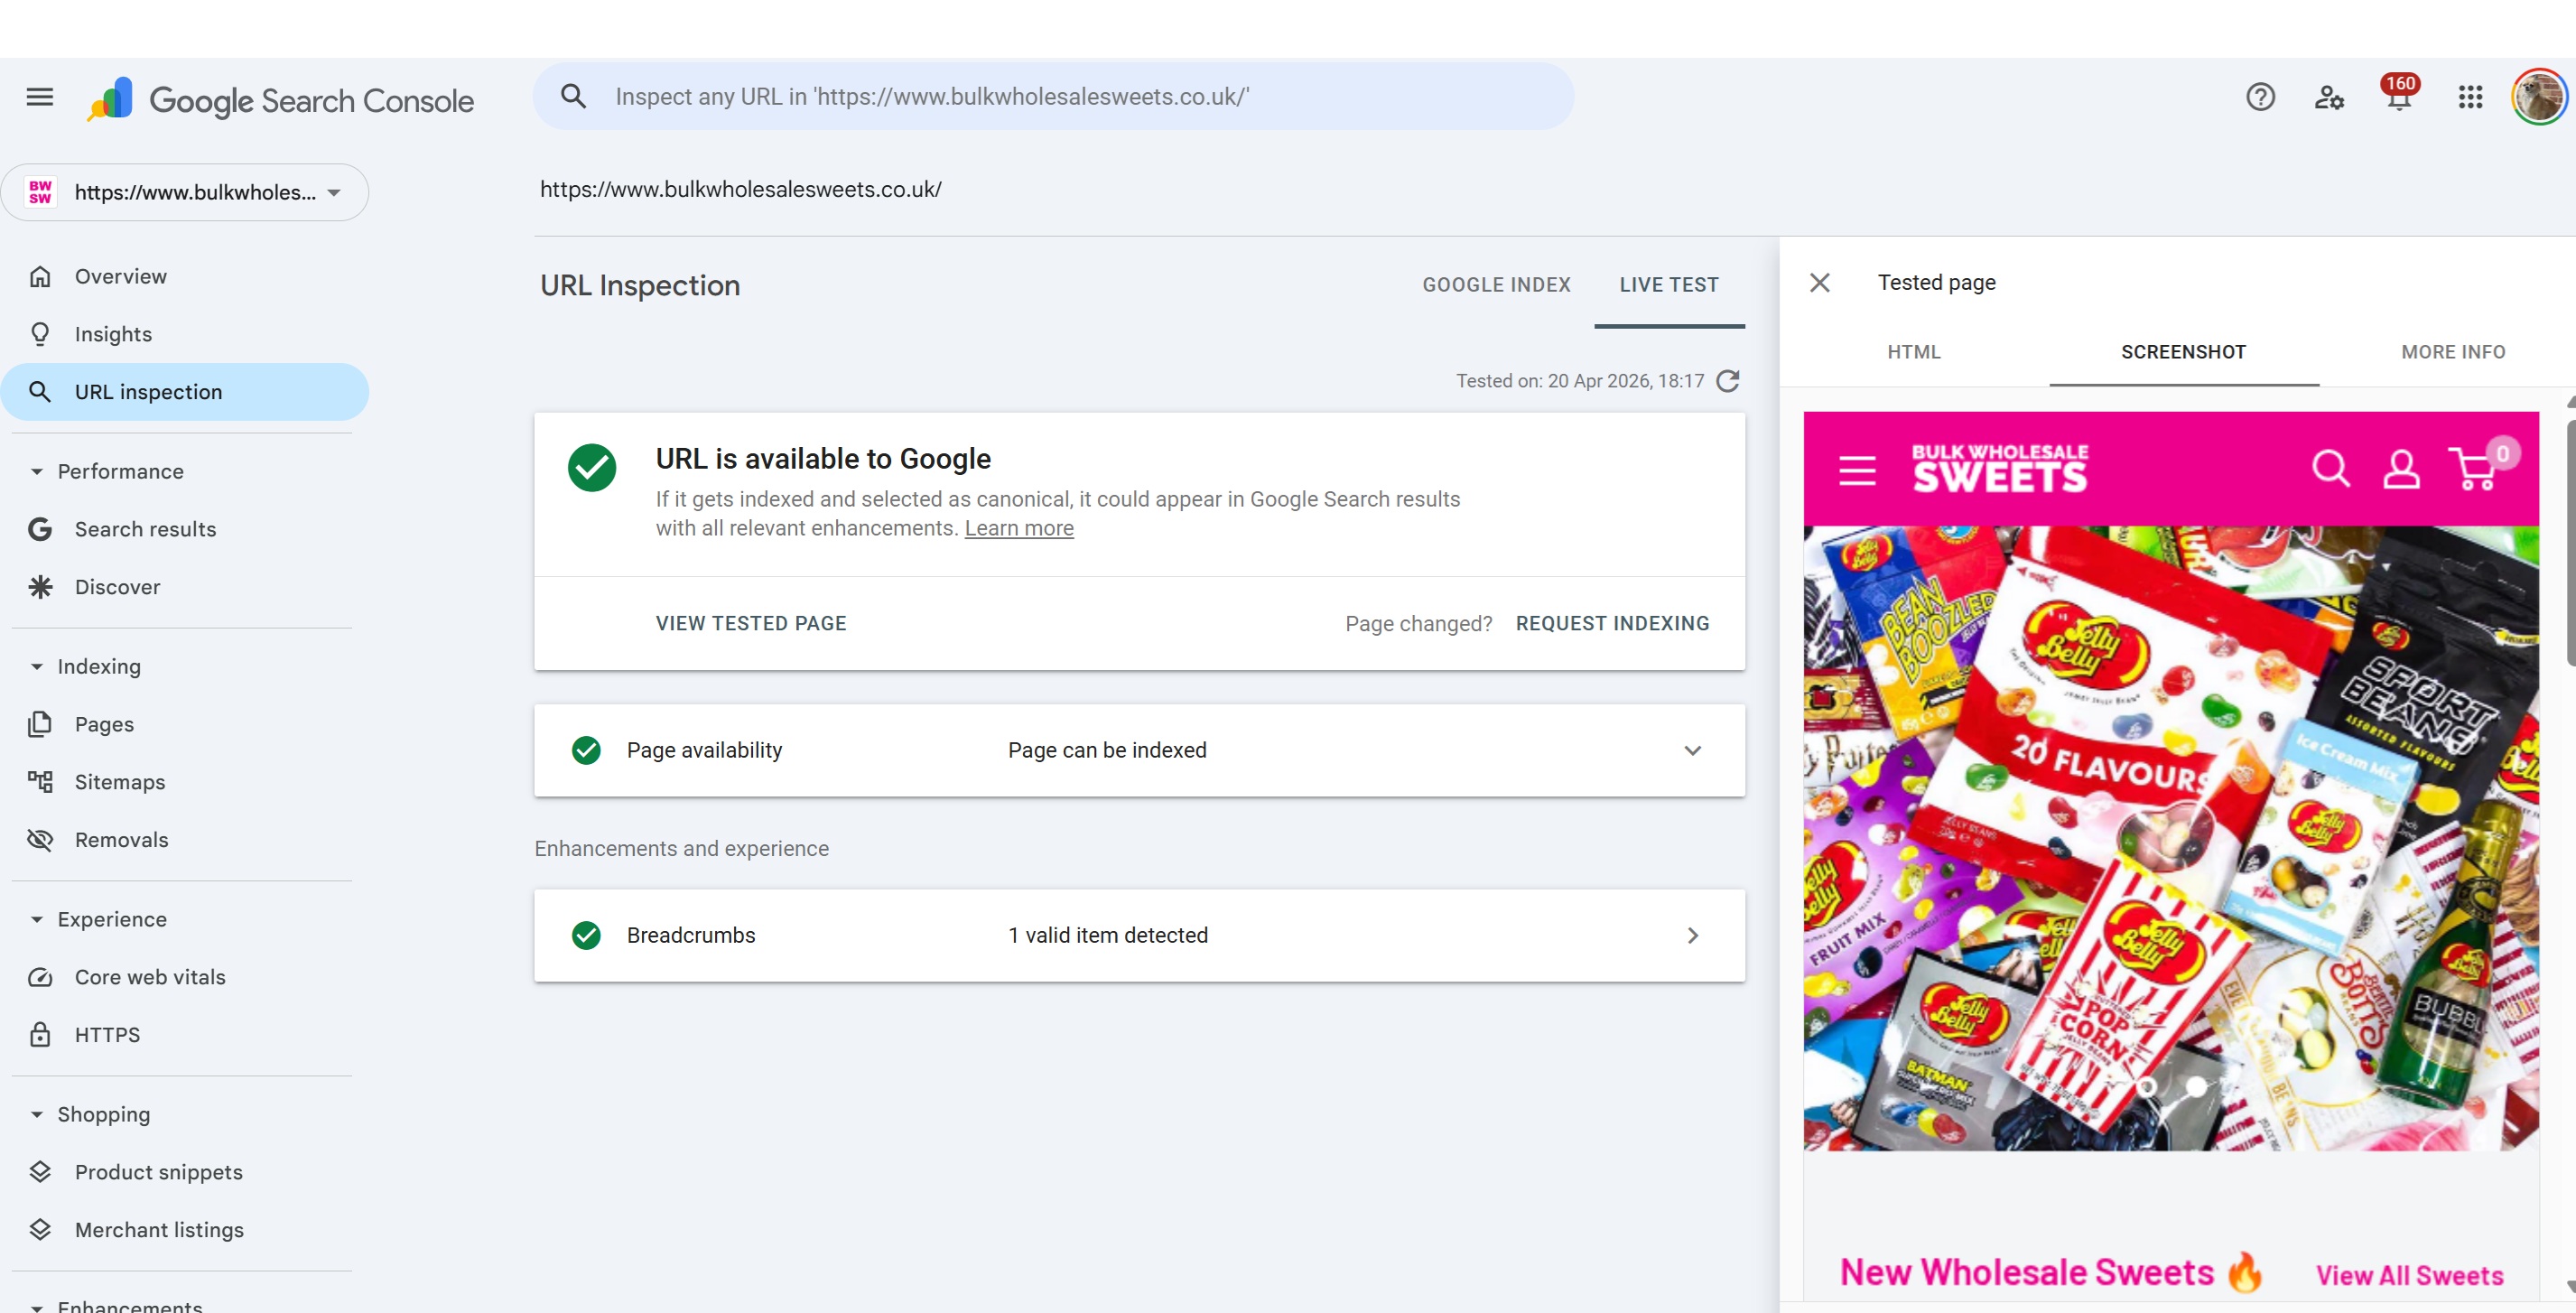
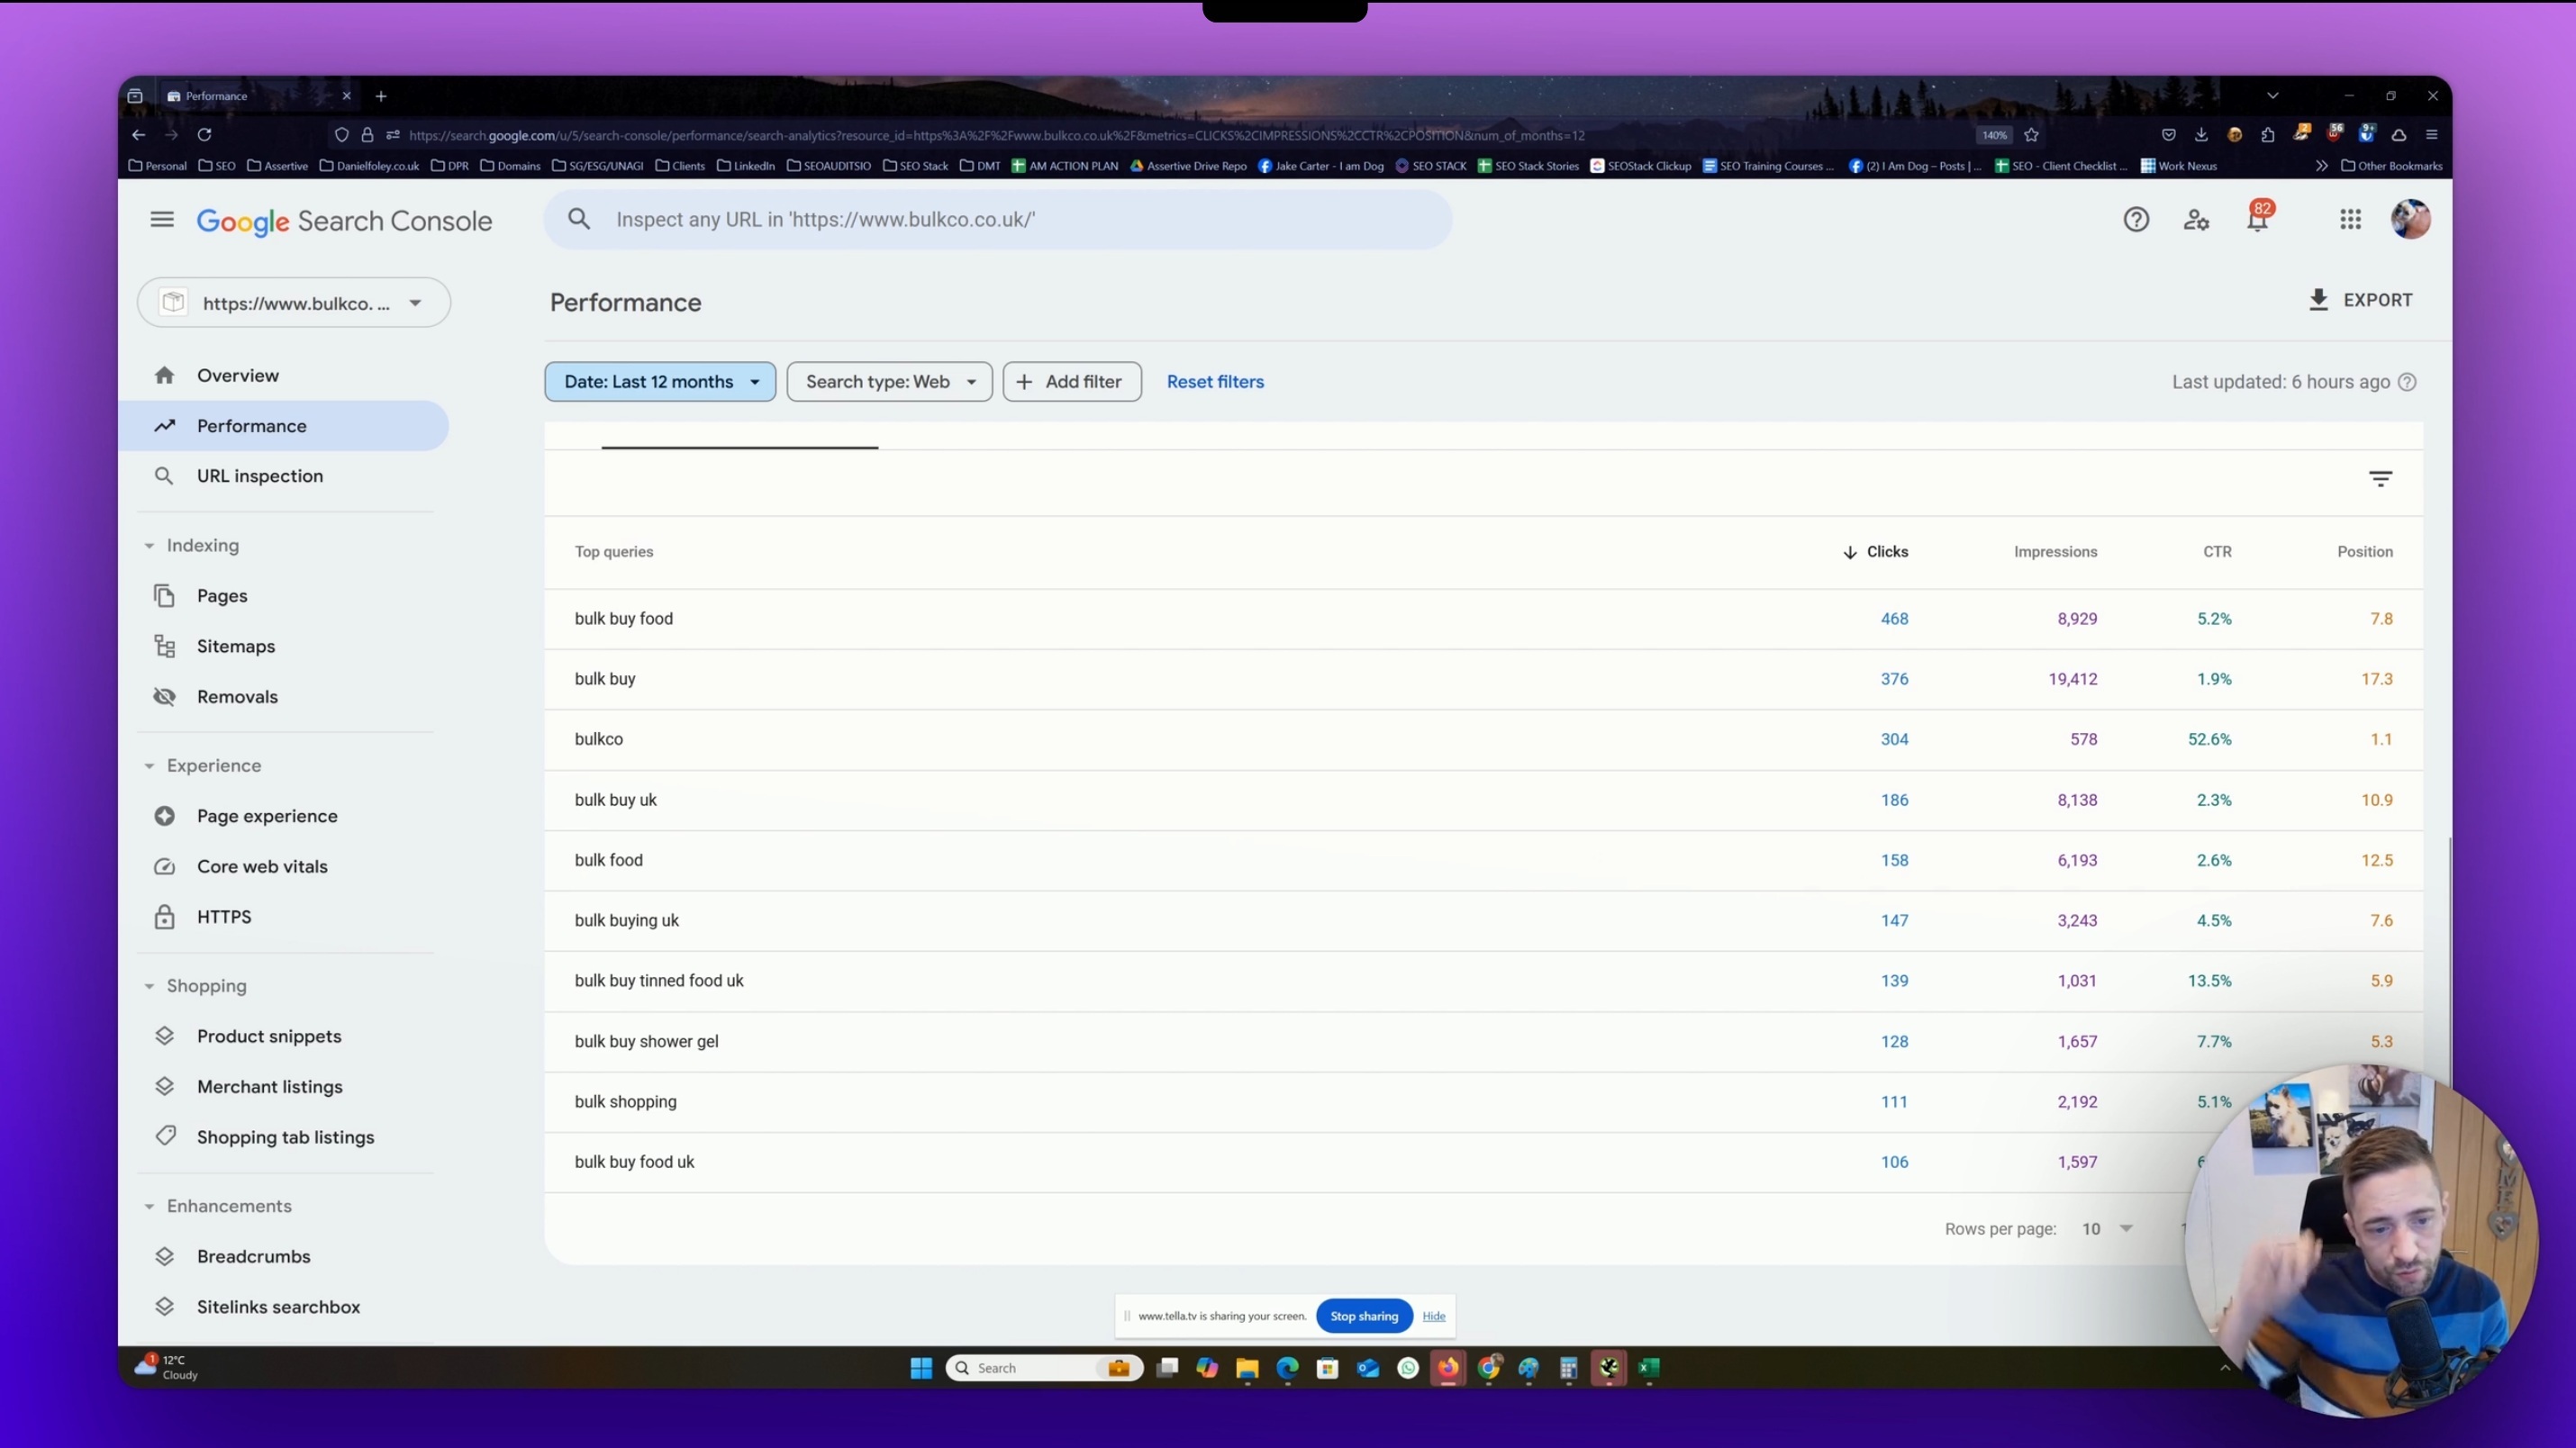
Analyse each websites google search console data from SEO Stack? this is UNLIMITED (not constrained by GSC api limitations)
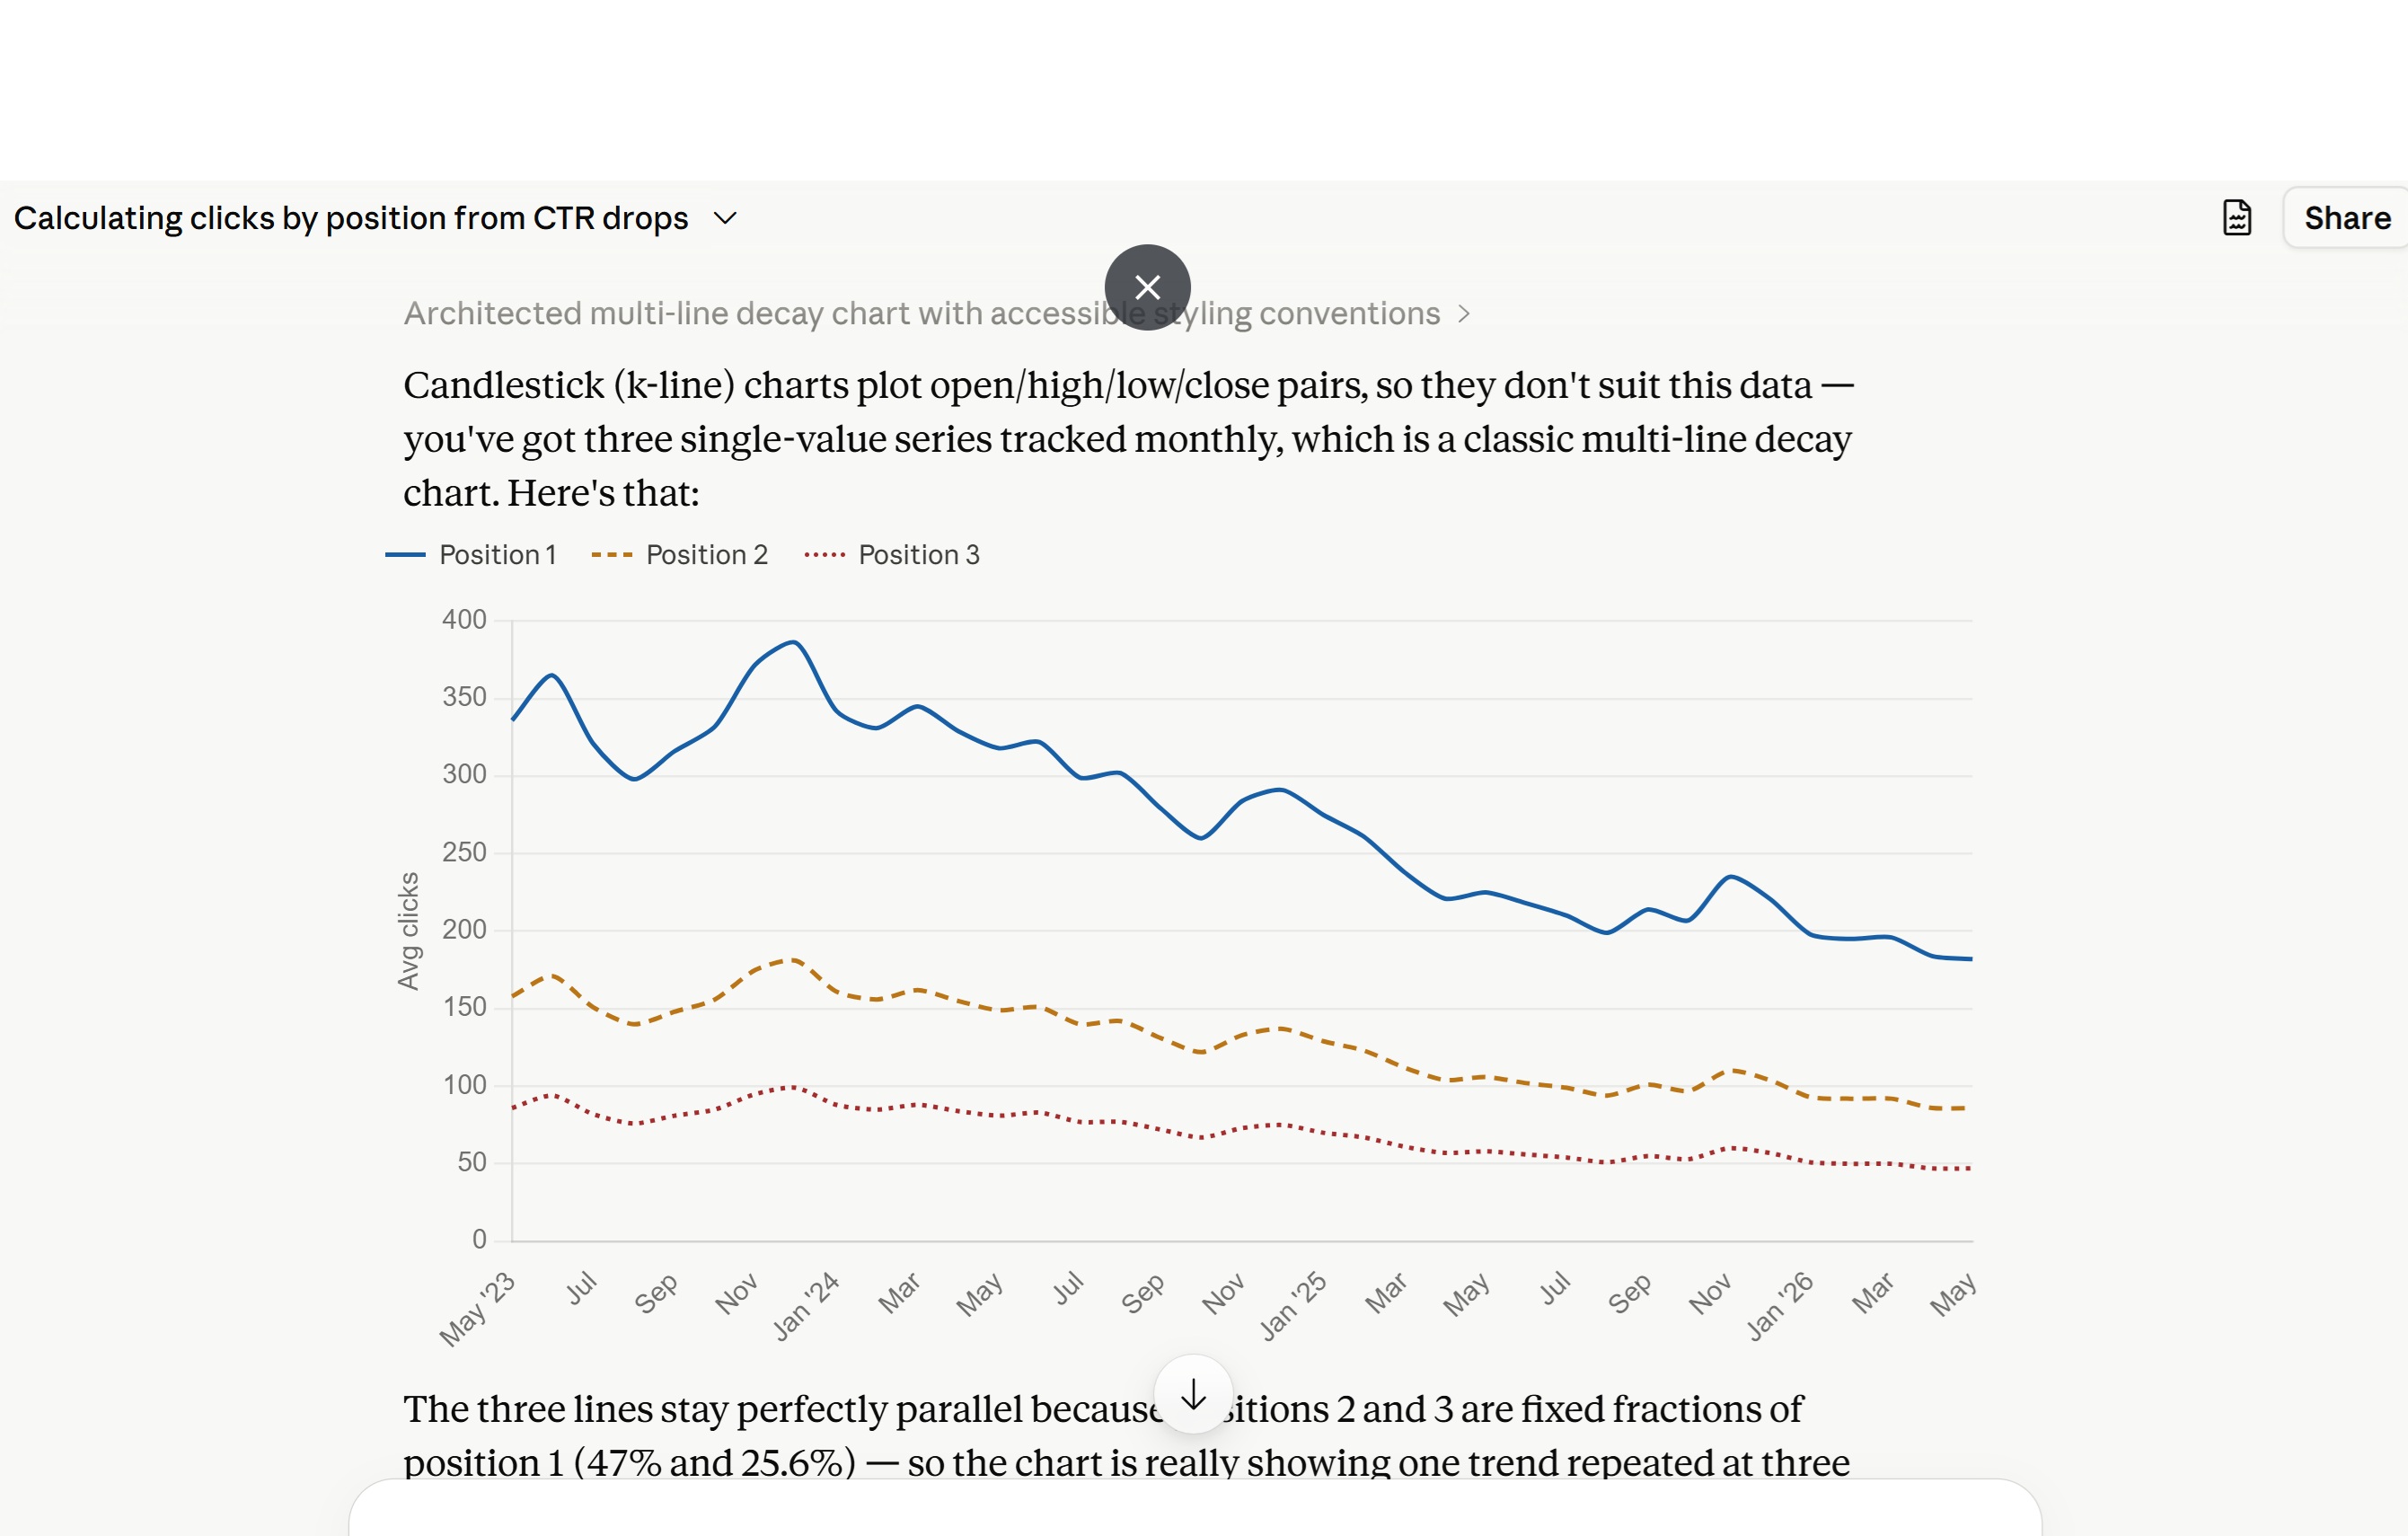
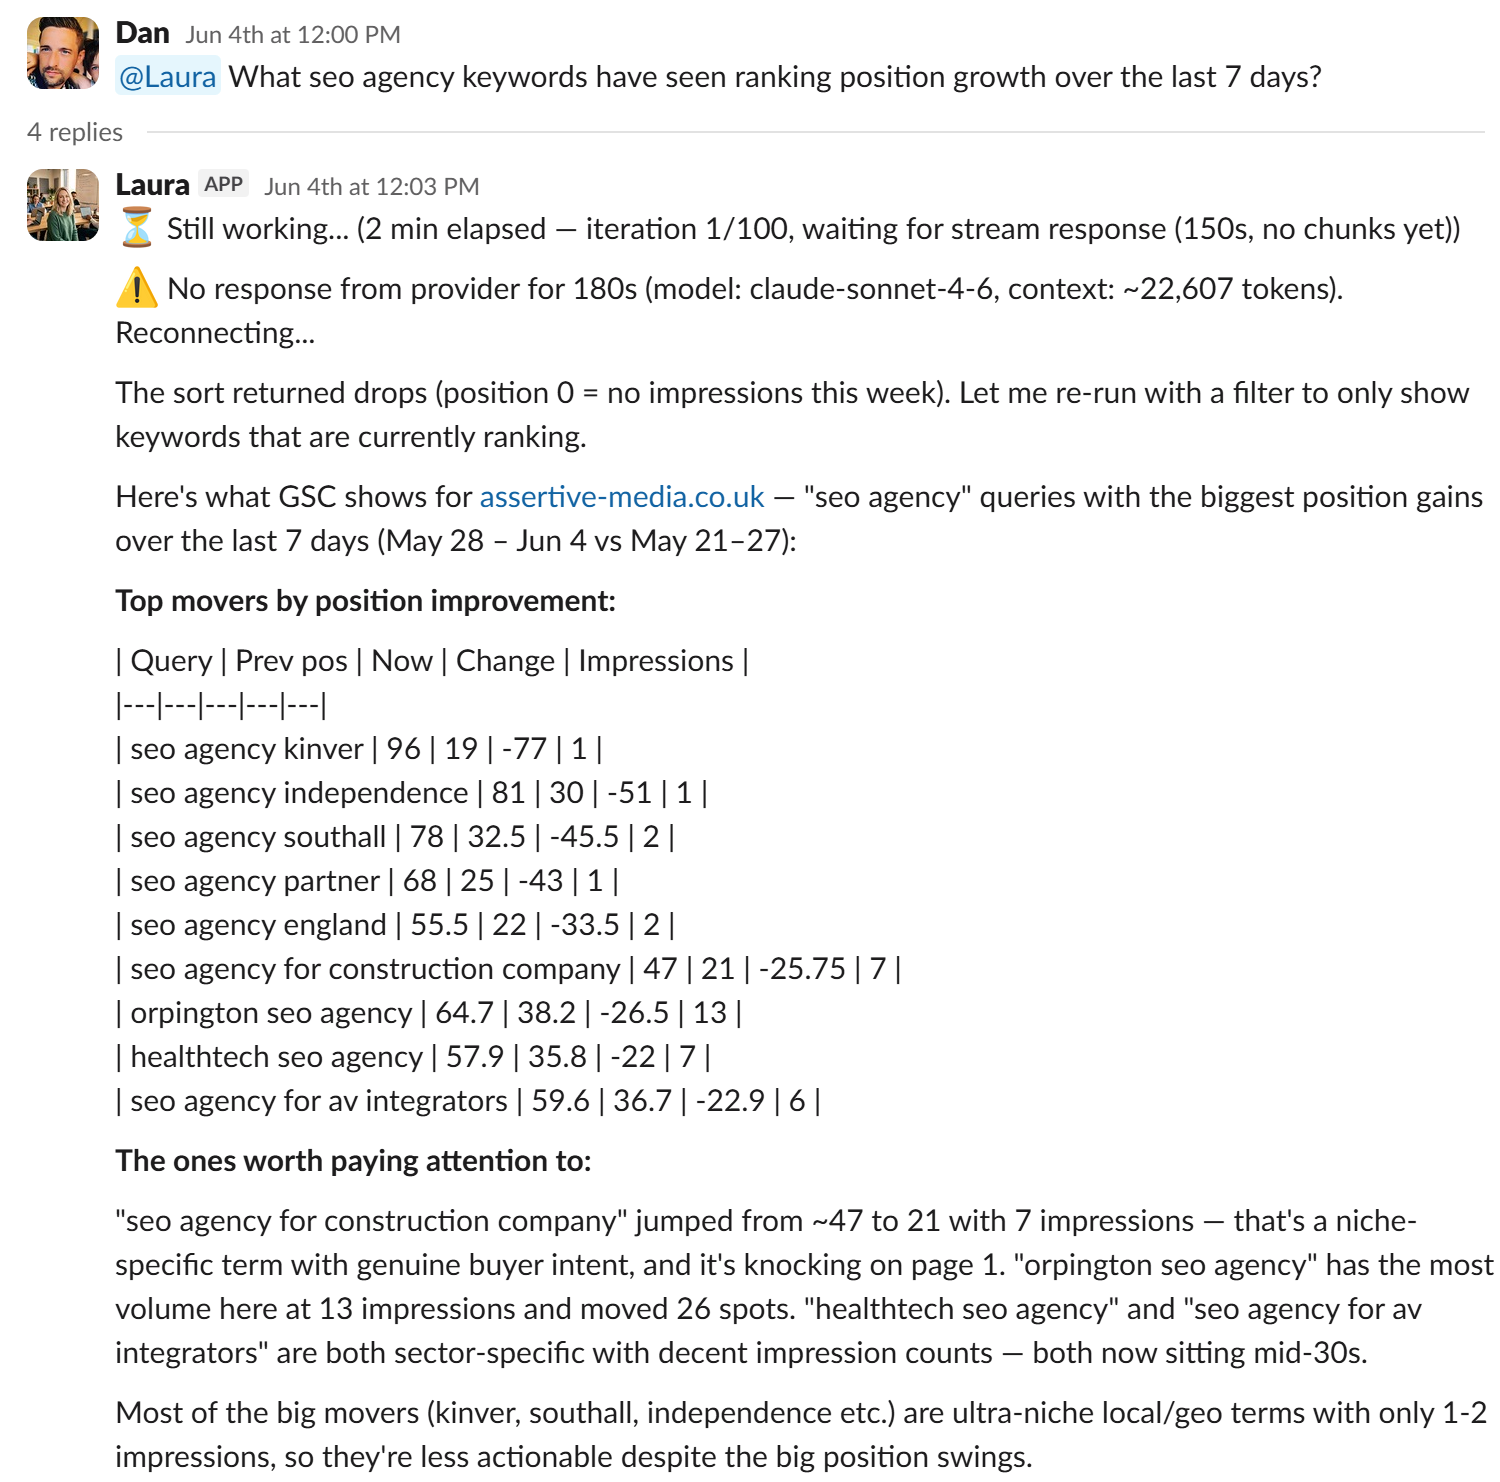
Analyse ranking changes (new rankings, lost rankings, rankings increased or decreased
Analyse pages dropped from the index? or new pages being served?
Analyse sudden ranking changes or wider ranking shifts after Google core updates?
Identify cannibalisation?
Identify keyword overlap?
Find content gaps?
Audit content?
Propose new content ideas?
And so much more (internal links, schema etc)
Well - in this guide I show you how you can create your OWN Slack based AI agent (or, you can use another platform - you can run HERMES / OPENCLAW + SEO Stack and output elsewhere).
I have set up 2 AI Agents in SLACK now who do all sorts of useful things to with SEO reporting, analysis, strategy and more.
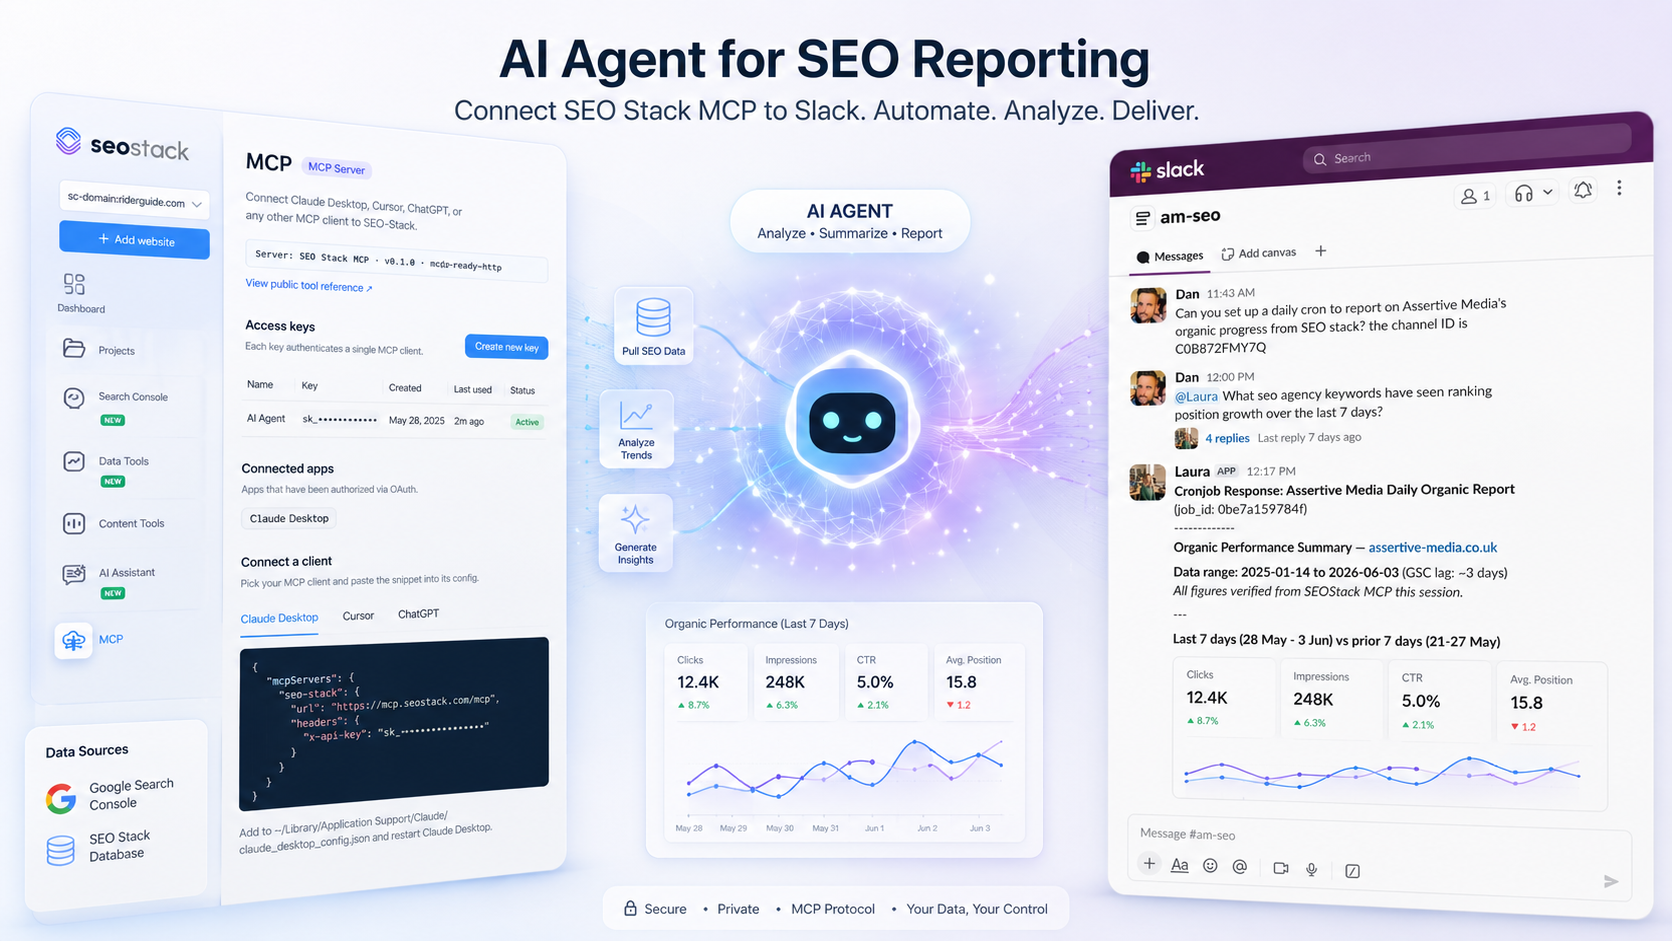
LAURA - MY AI AGENT IN SLACK WHO ANALYSES GSC DATA DAILY FOR CLIENTS AND REPORTS ON CHANGES
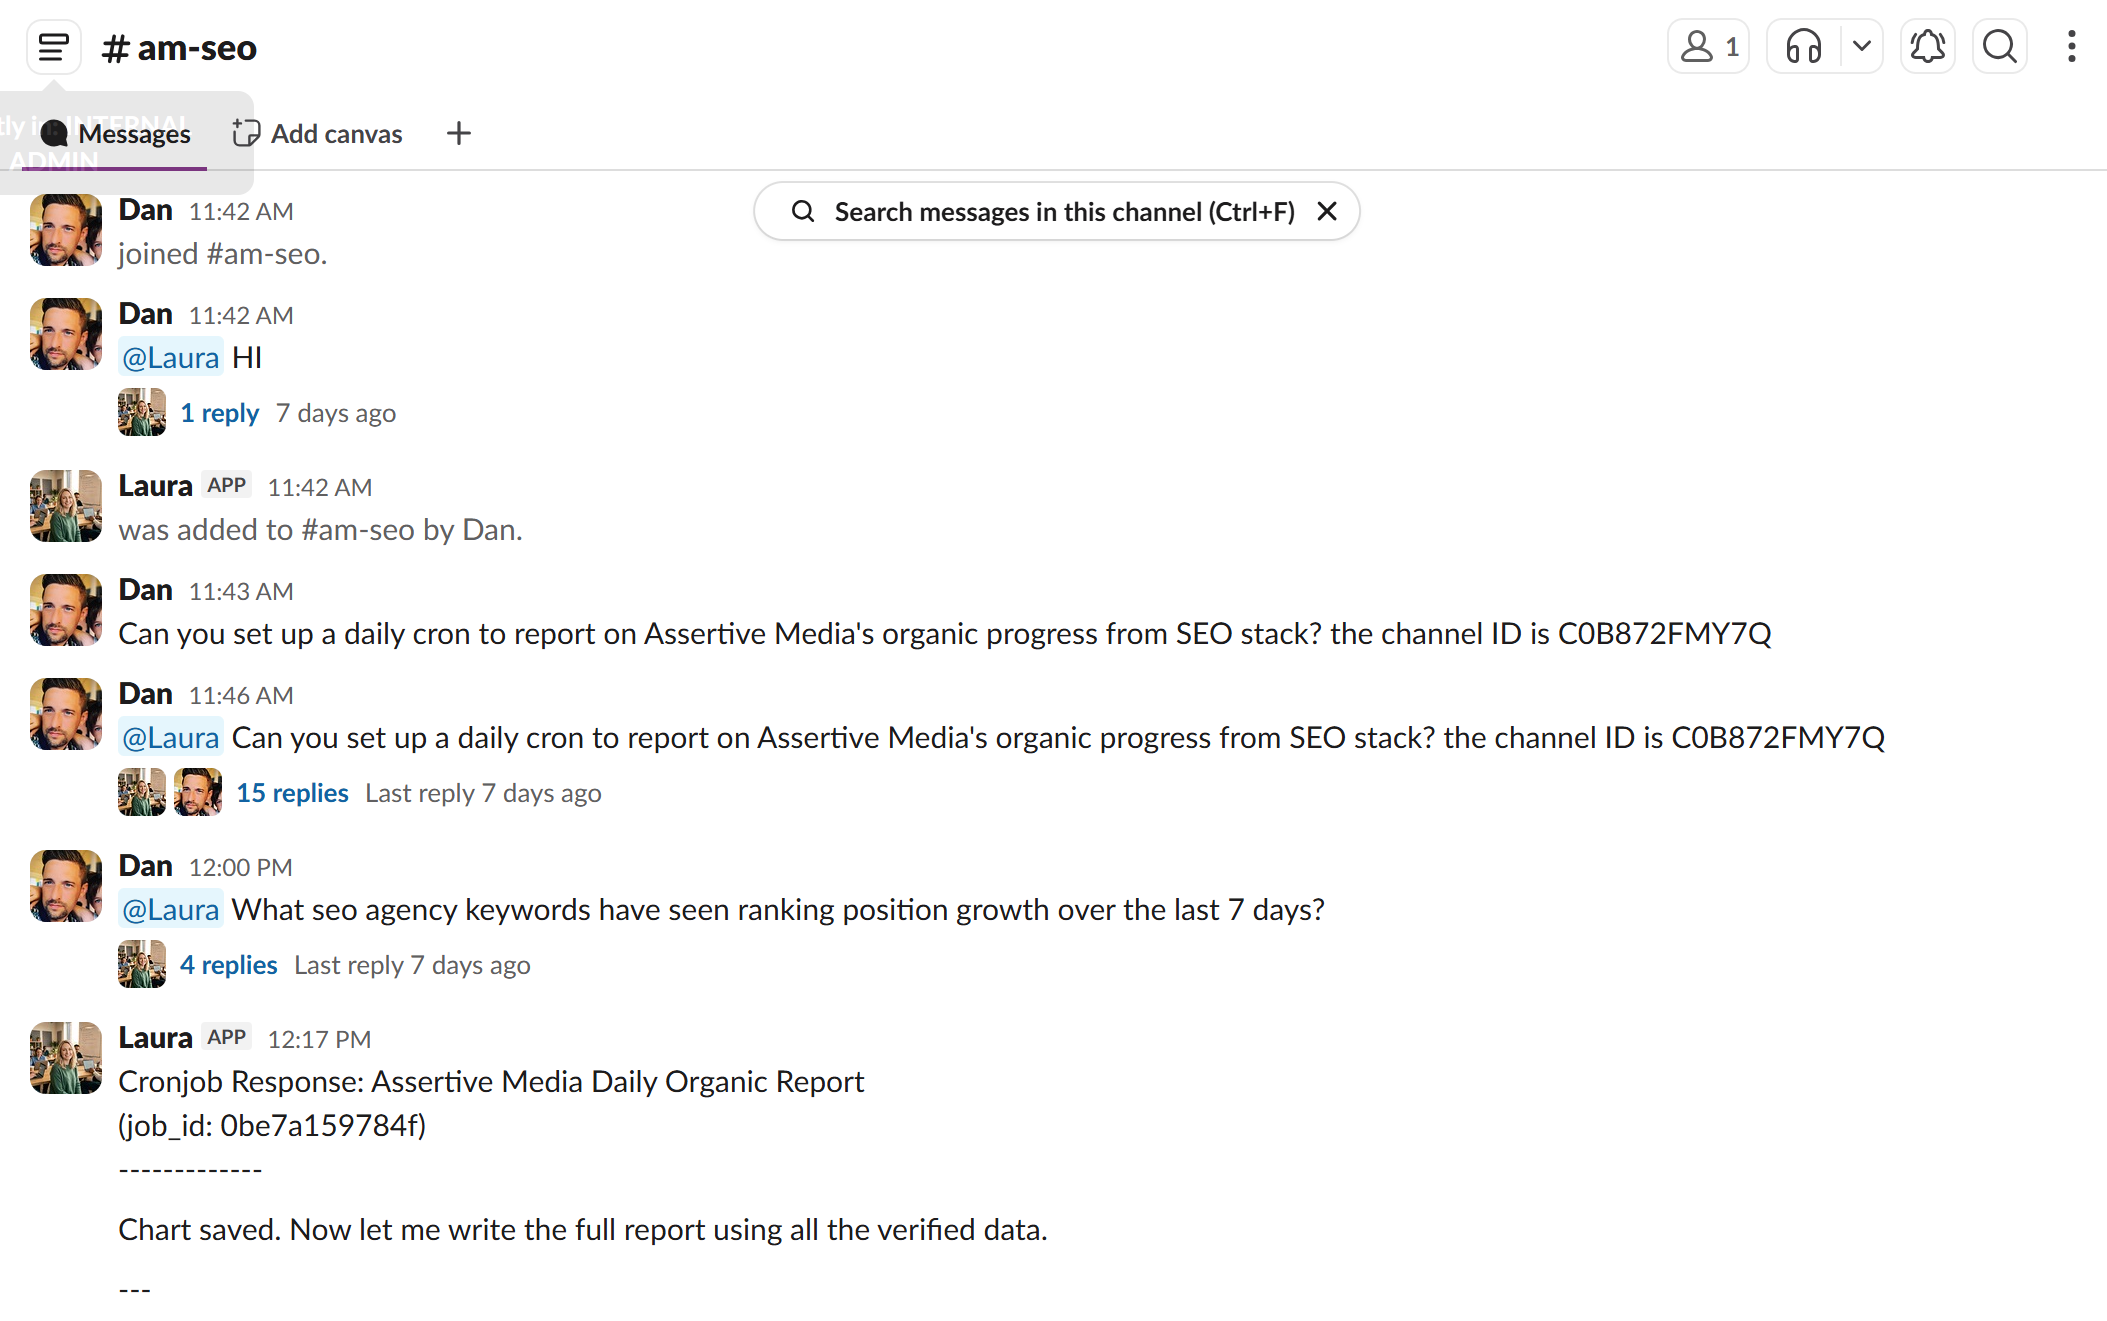
I can ask Laura questions around any of the websites in our SEO stack account - I can ask for anything
Then I set Laura up to run a daily cron job to go through all of the websites, identify everything from sudden ranking changes, changes to keyword positions, rankings, traffic, CTR - basically, she will find ANYTHING that is important that we should know about.
Unlike the traditional SEO approach where we need to go through each client account search console profile on a regular basis, we've automated this so the updates come to us (and to clients - with guardrails obviously).
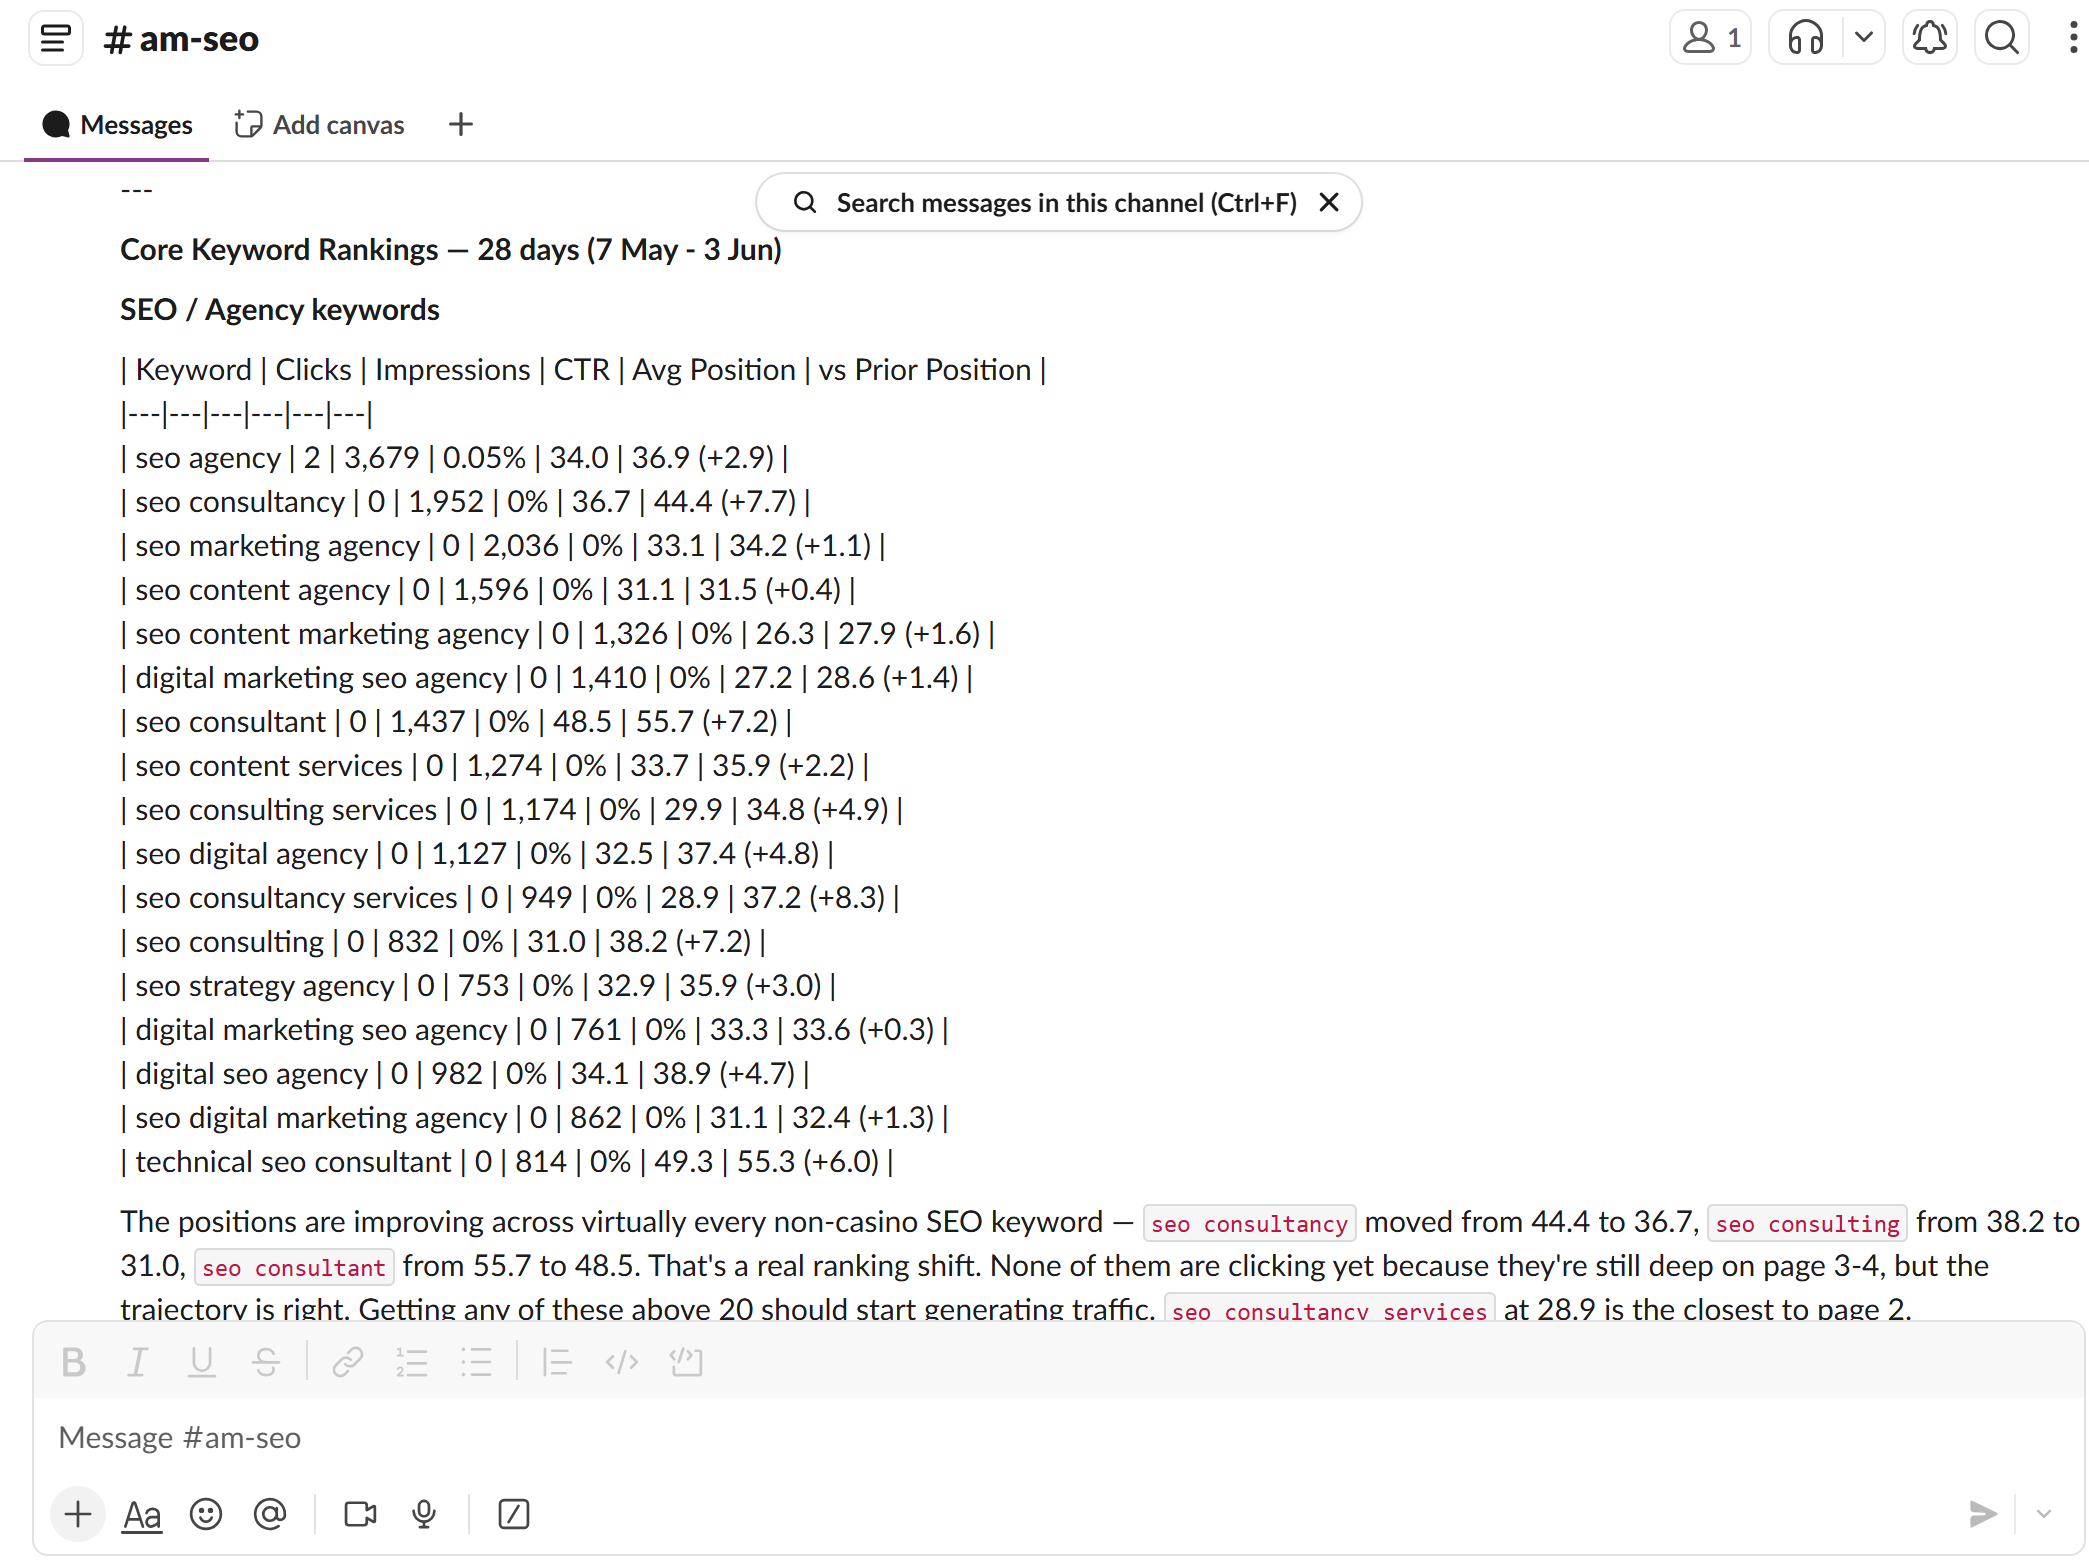
Laura has her daily cron which she reports to me on >
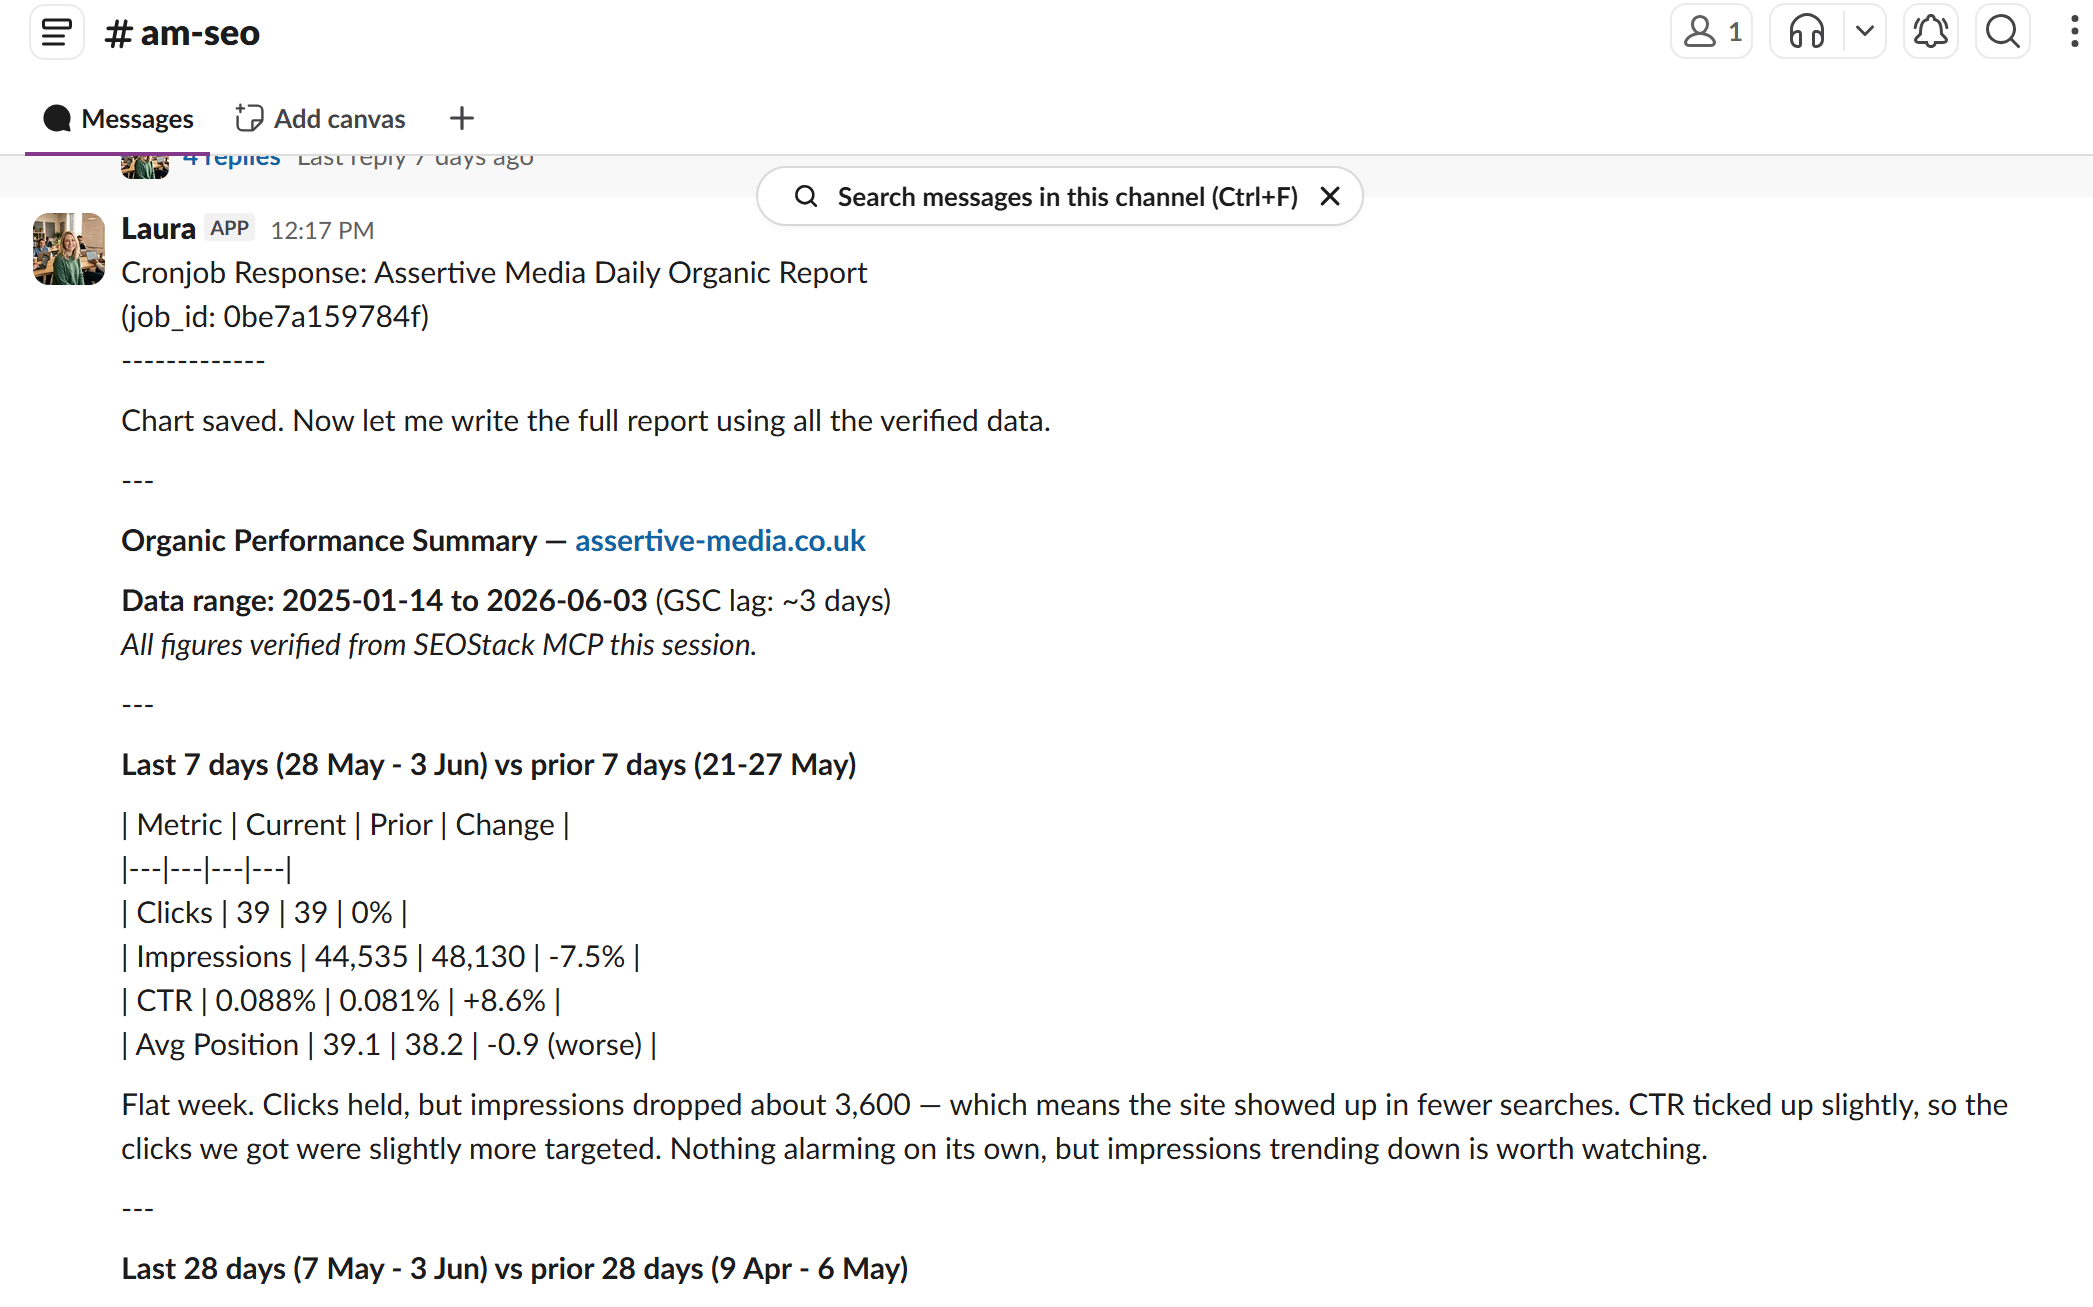
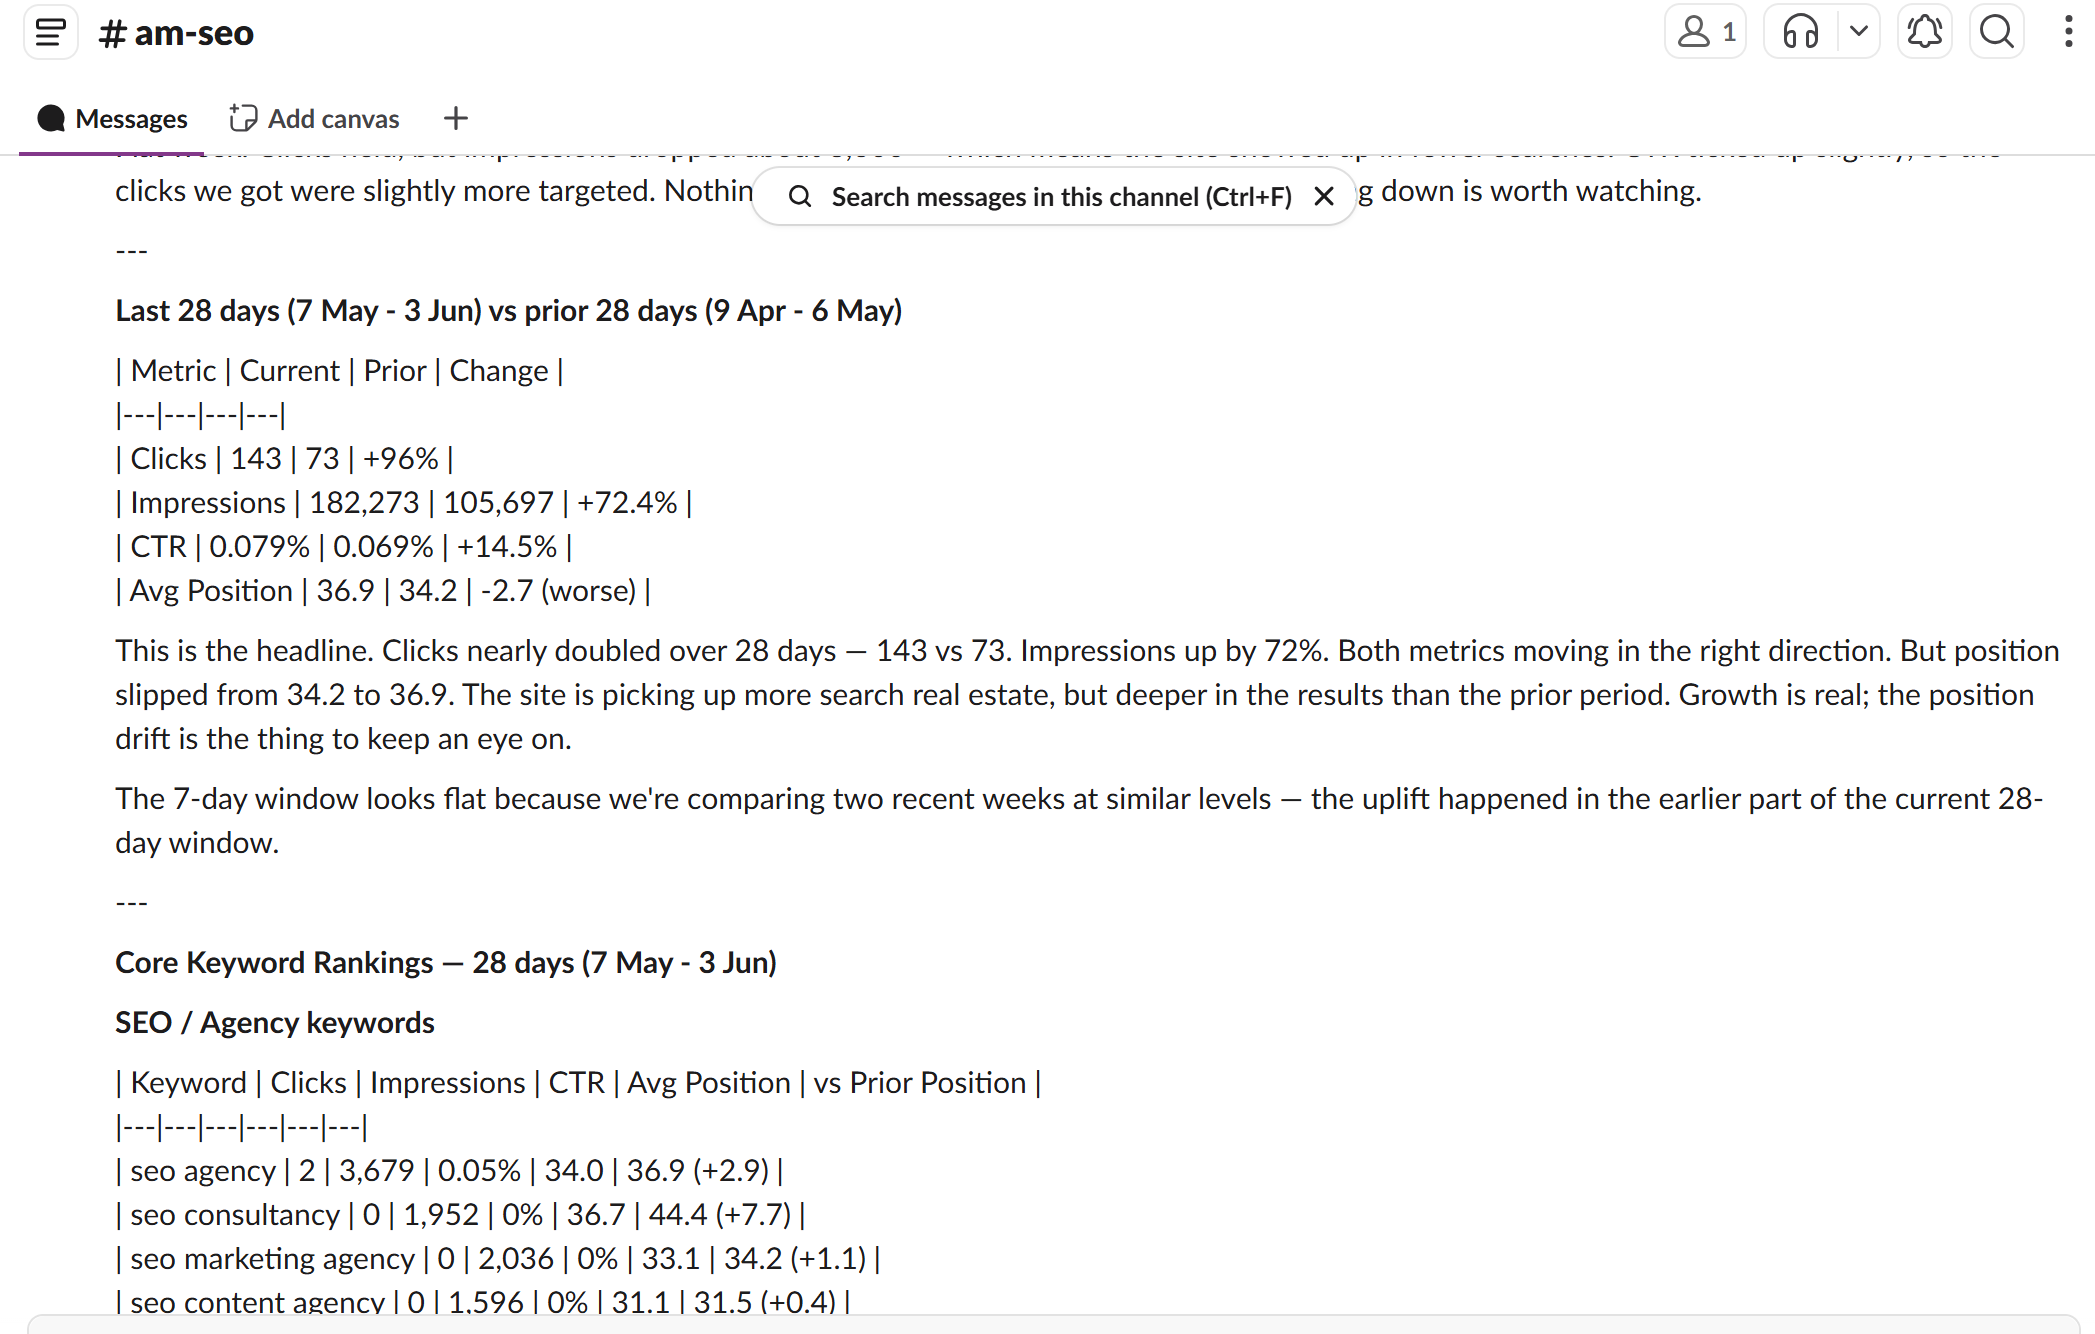
I gave Laura a list of core and secondary keywords that I wanted her to report on daily - for my SEO agency - https://www.assertive-media.co.uk
OK - so we;ll look at more AI AGENT Use Cases for SEO after helping you to get your own AI SEO Agent set up in slack who can complement you or your team whether you are an inhouse SEO or an SEO agency - these AI agents can be deployed to do amazing things.
For this set up you will need:
A VPS / Dedicated server (a cheap VPS is enough)
An SEO Stack account (Free to try for 1 month then from $20 a month)
Hermes (which we'll install)
So, let;s GO!
Hermes Agent on a Windows VPS - Complete Setup Guide
From a bare remote desktop to a working Slack agent that can use the SEO Stack MCP.
This guide takes you through five stages in order. Do them in sequence the first time, each stage assumes the previous one is done.
Set up the remote desktop (Windows VPS)
Install Hermes
Set up the agent (profile + persona)
Connect the SEO Stack MCP
Build the Slack app and connect it to the agent
There's a troubleshooting section at the end covering the failures you're most likely to hit. Read it if anything stalls.
A note on placeholders: wherever you see analyst, that's the agent profile name. Swap in whatever you want to call your agent. Wherever you see <...>, replace the whole thing including the brackets.
Stage 1 - Set up the remote desktop
The goal here is a Windows machine in the cloud that's always on, so your agent keeps running when your own computer is off.
1.1 Provision a Windows VPS
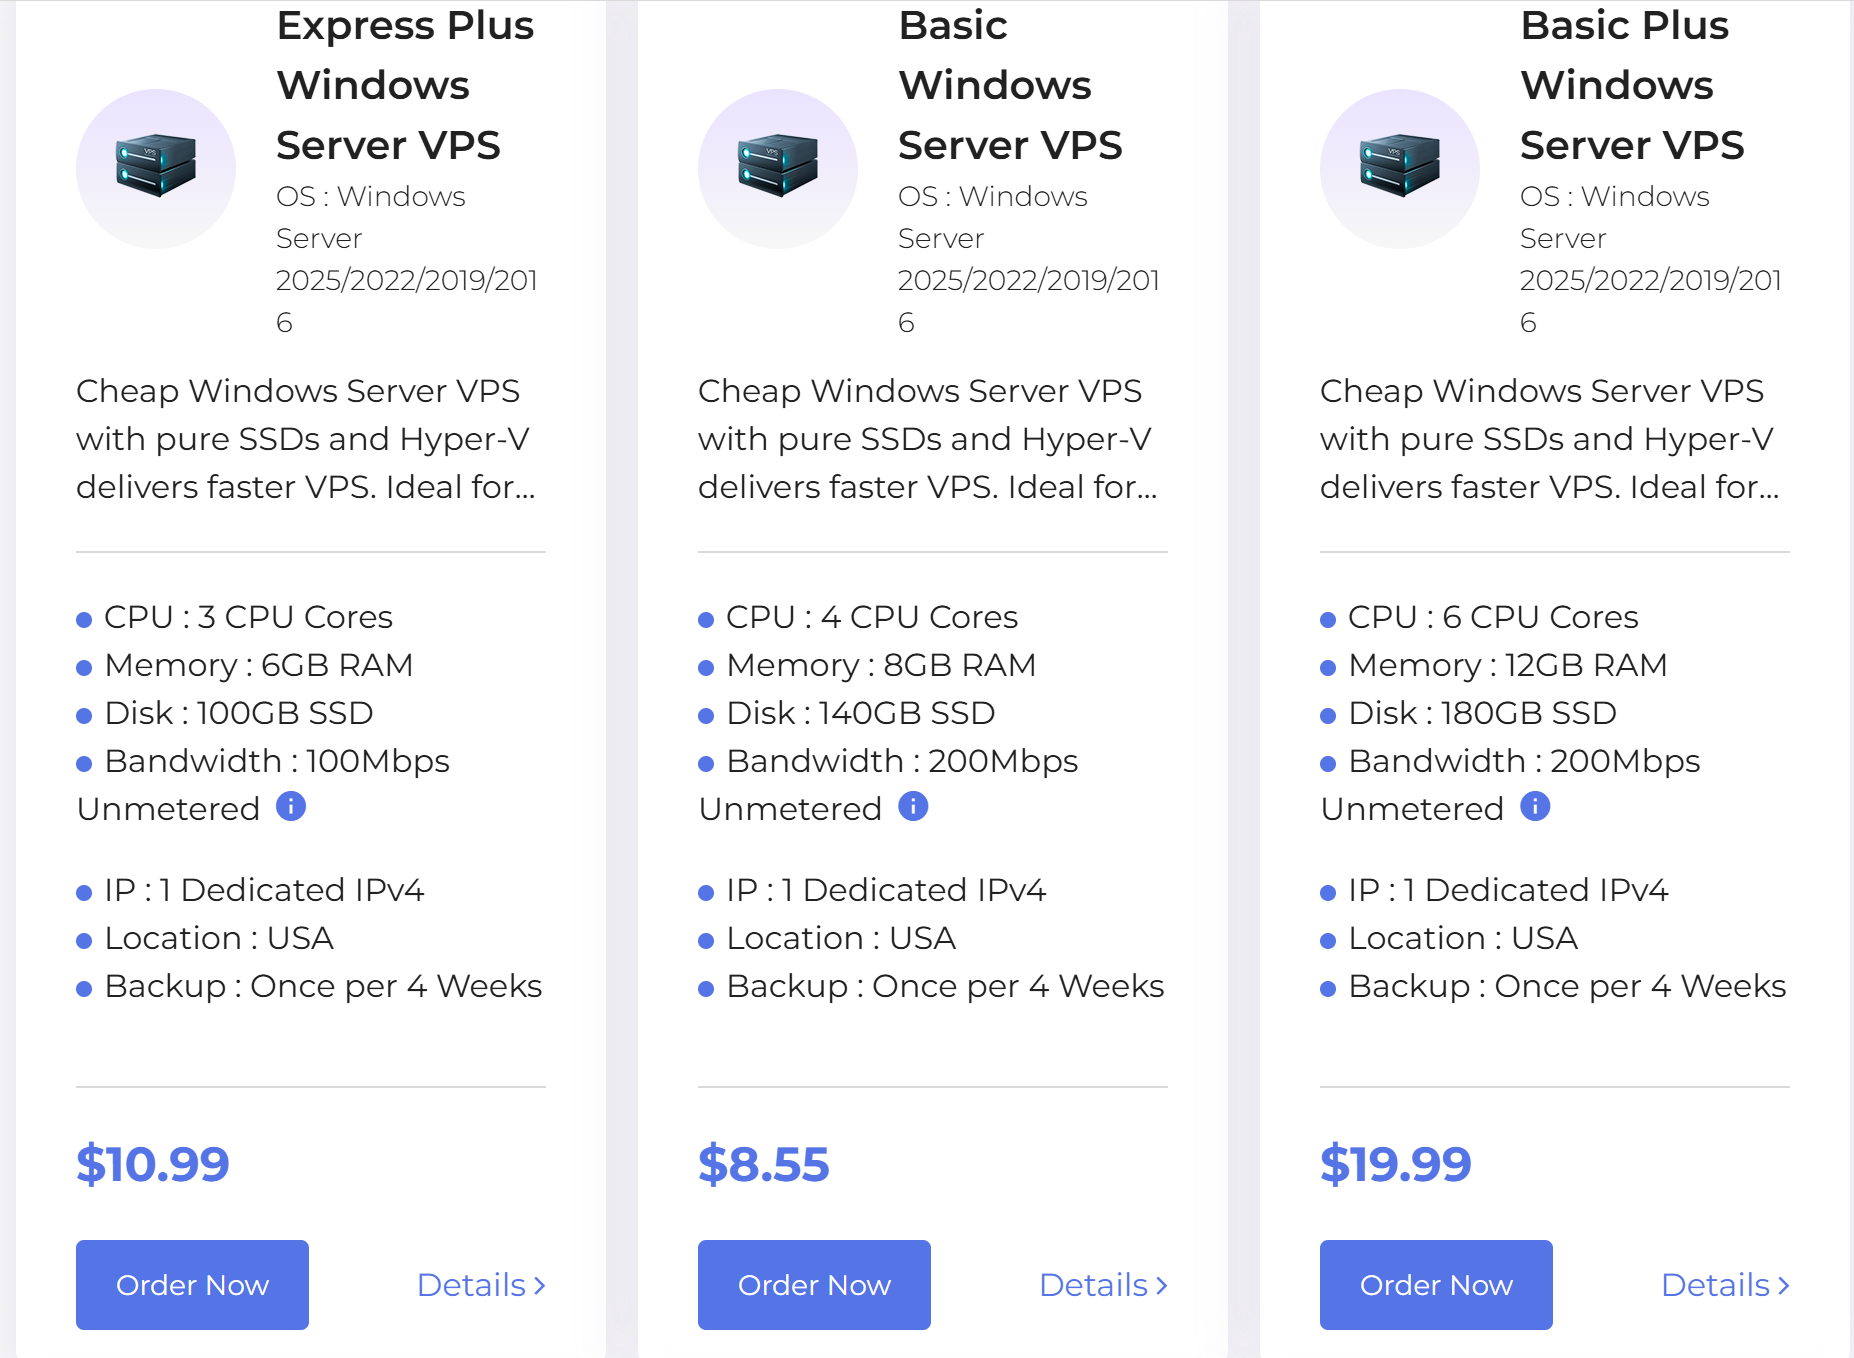
Pick a provider (common ones: Contabo, Hostinger, OVH, Vultr, Kamatera, AWS Lightsail). When you order, choose:
Operating system: Windows Server 2022 (or Windows 11). Either works.
Specs: 4 GB RAM minimum, 8 GB comfortable if you'll run more than one agent. 2+ vCPUs. 50 GB+ disk. Hermes itself is light because the heavy model work happens via API, but each agent runs a Python process plus a browser, and that adds up.
Location: pick a region close to you for lower latency over RDP.
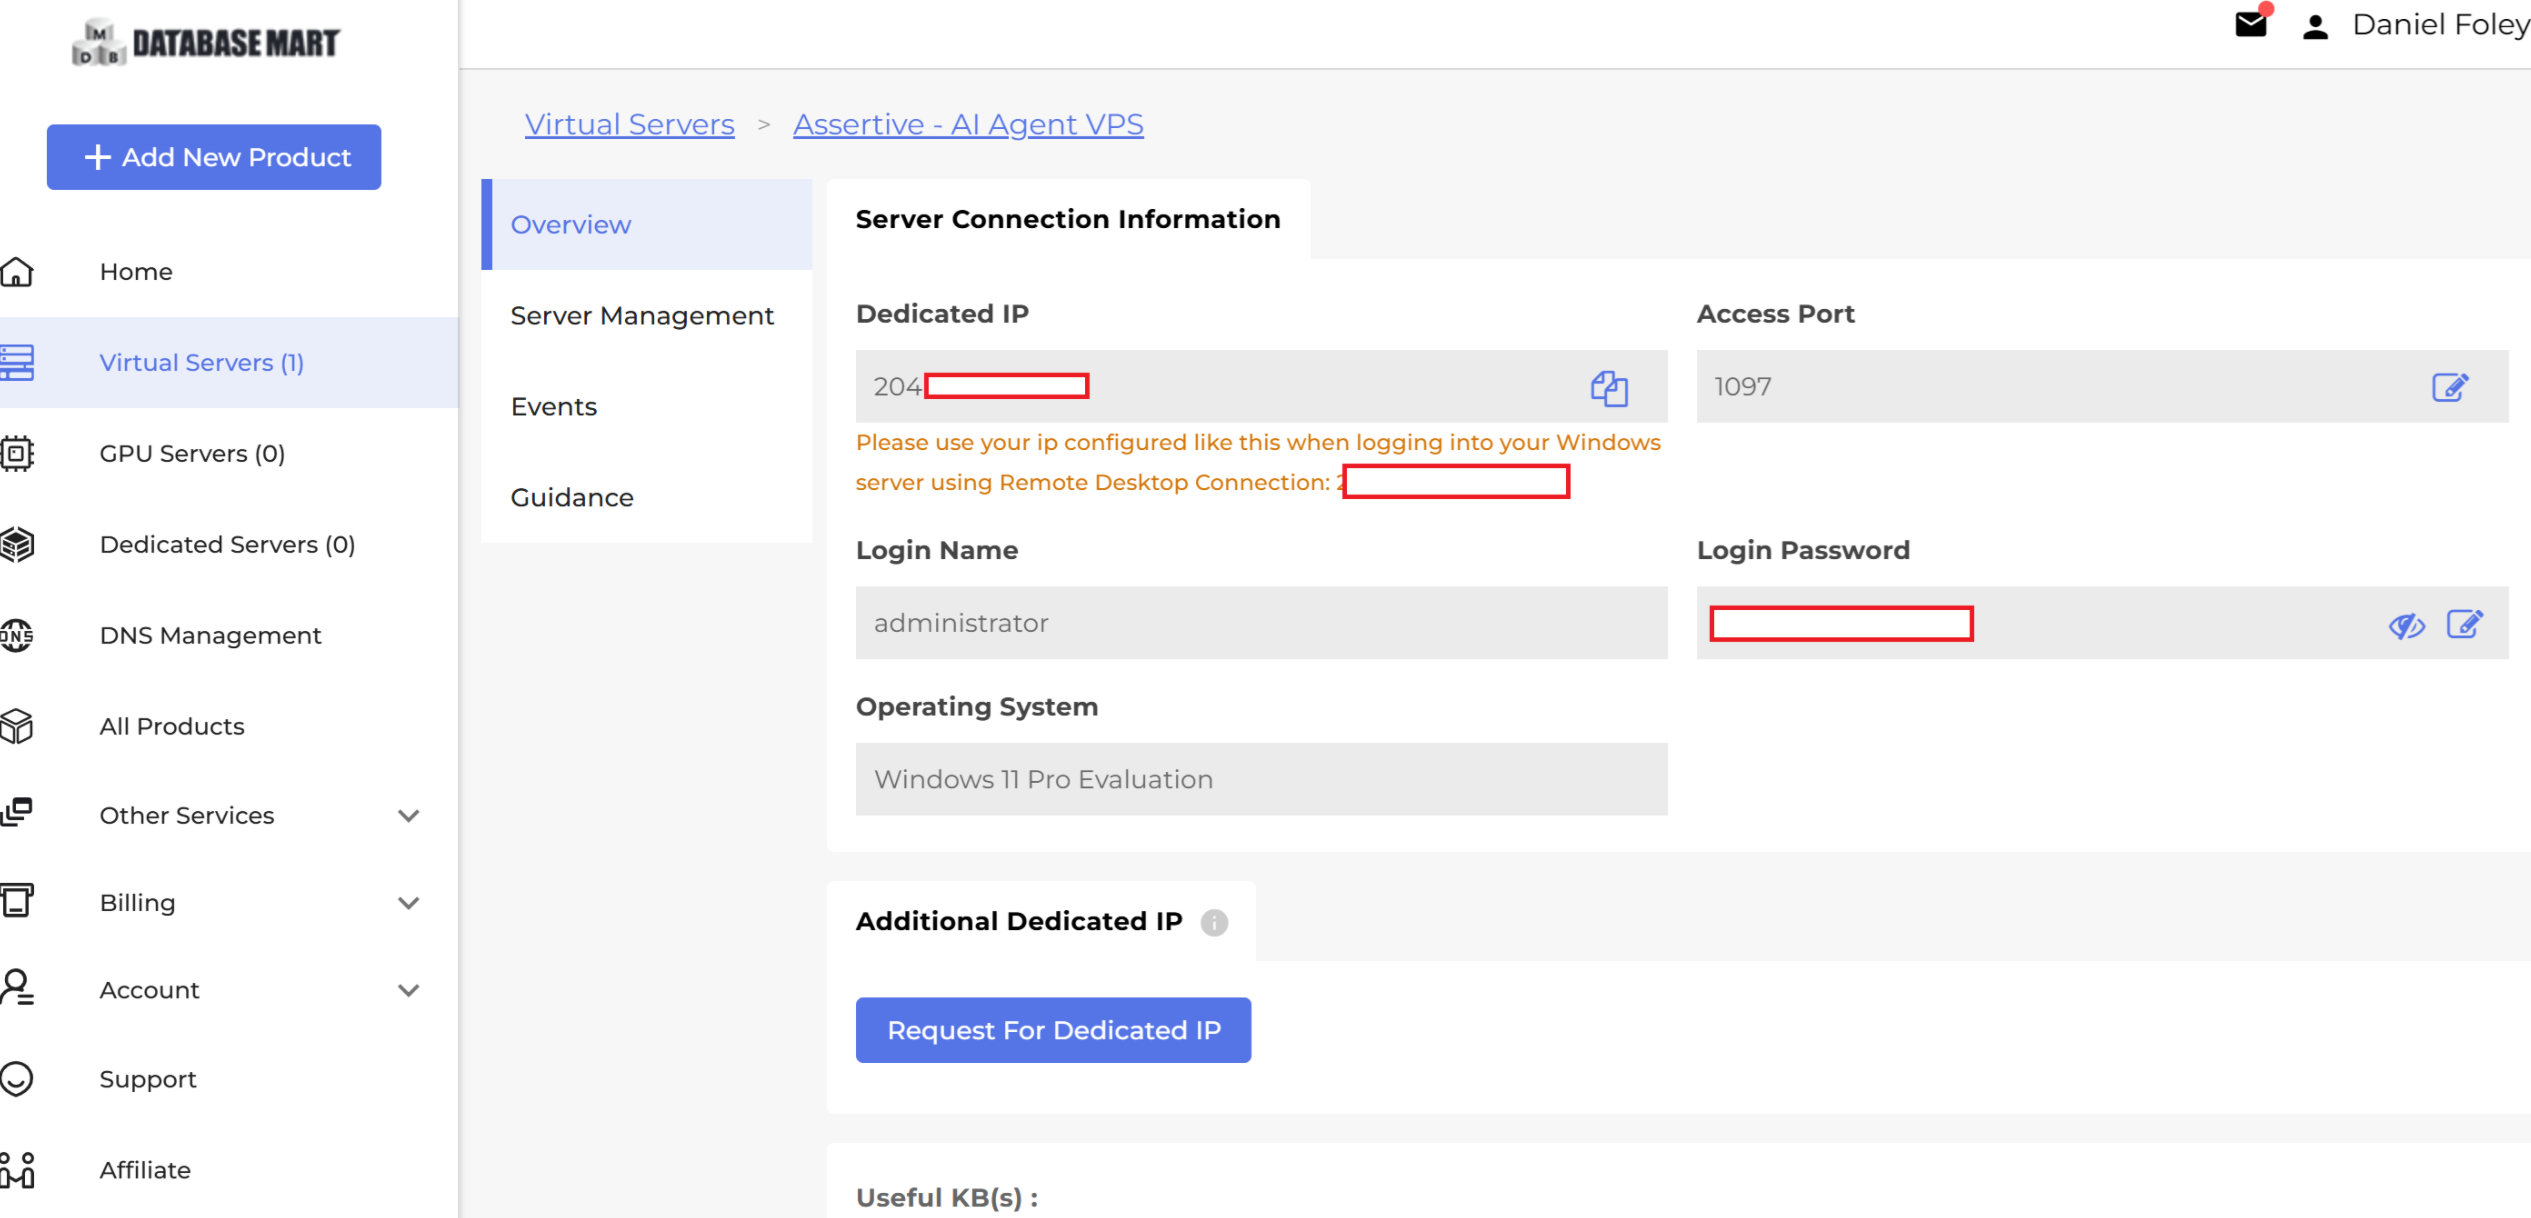
The provider emails you three things: the server's public IP address, an administrator username (usually Administrator), and a password. Keep these safe.
In our example we use Database Mart (https://www.databasemart.com/) as they are cheap, cheerful and quick to deploy. Sign up at Databse mart and simply select ADD NEW PRODUCT in your control panel >
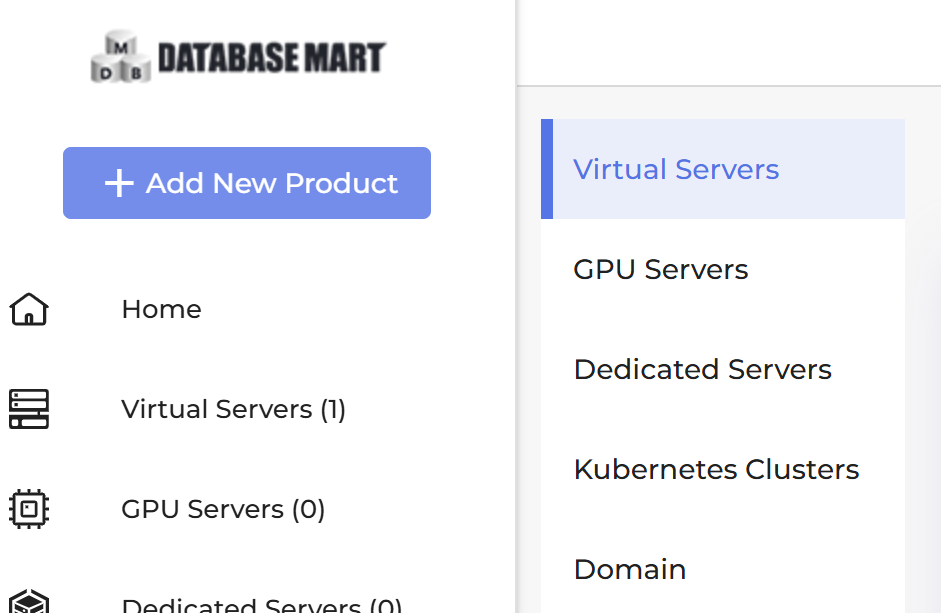
Then select one of the Windows Servers (you can select LINUX also but the set up sequence may be slightly different).
When you have provisioned your VPS you should be good to go!
Get your VPS login / access details from within your control panel - you'll need the IP, login name and password:
1.2 Connect over RDP
On Windows (your own PC):
Press the Start key, type
Remote Desktop Connection, open it.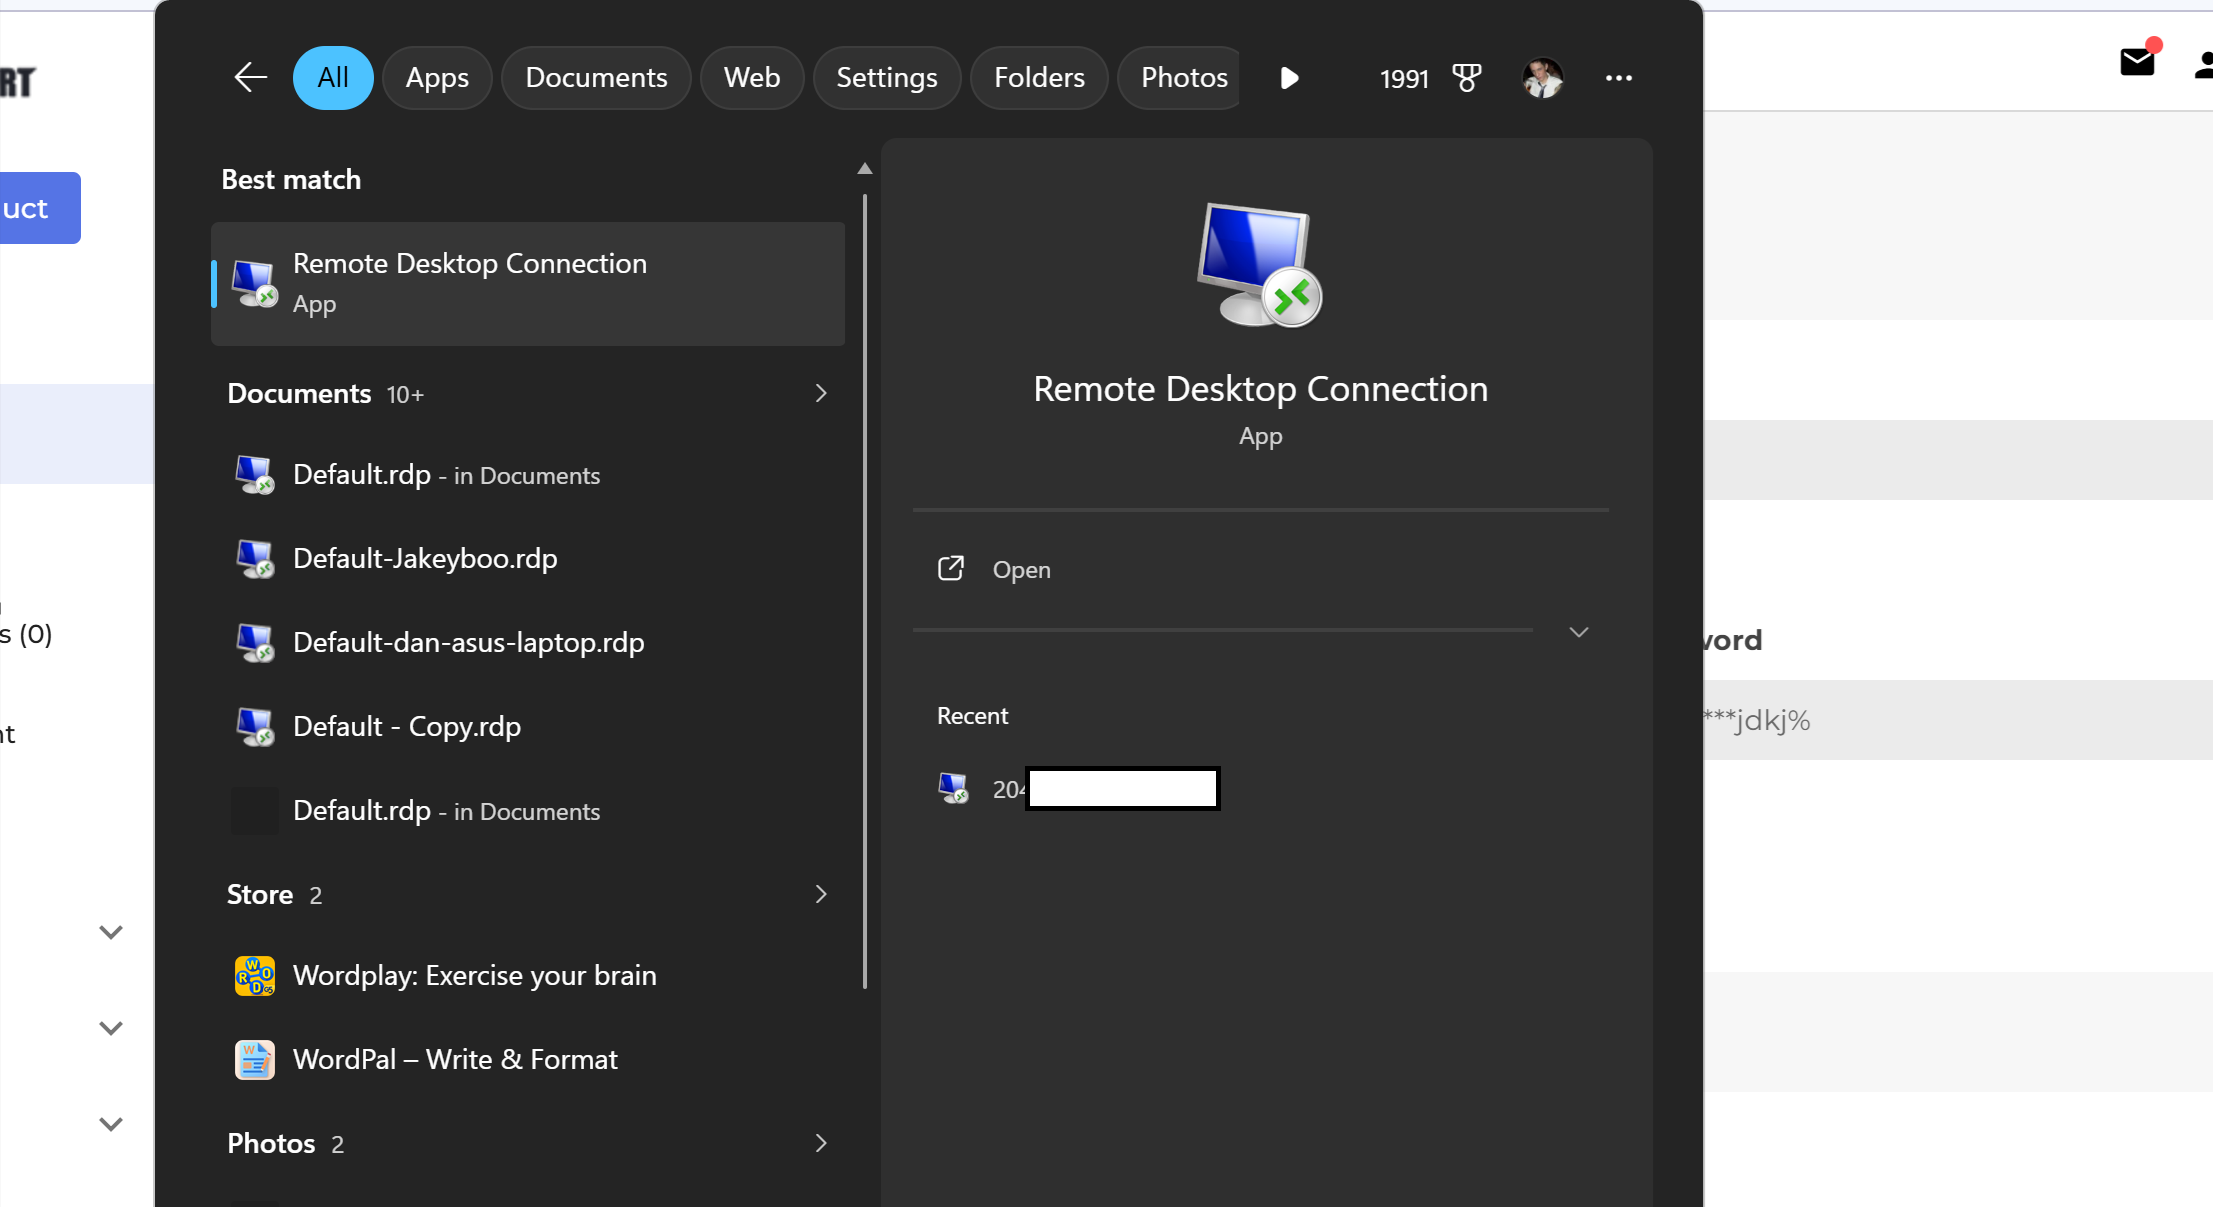
In Computer, enter the server IP.
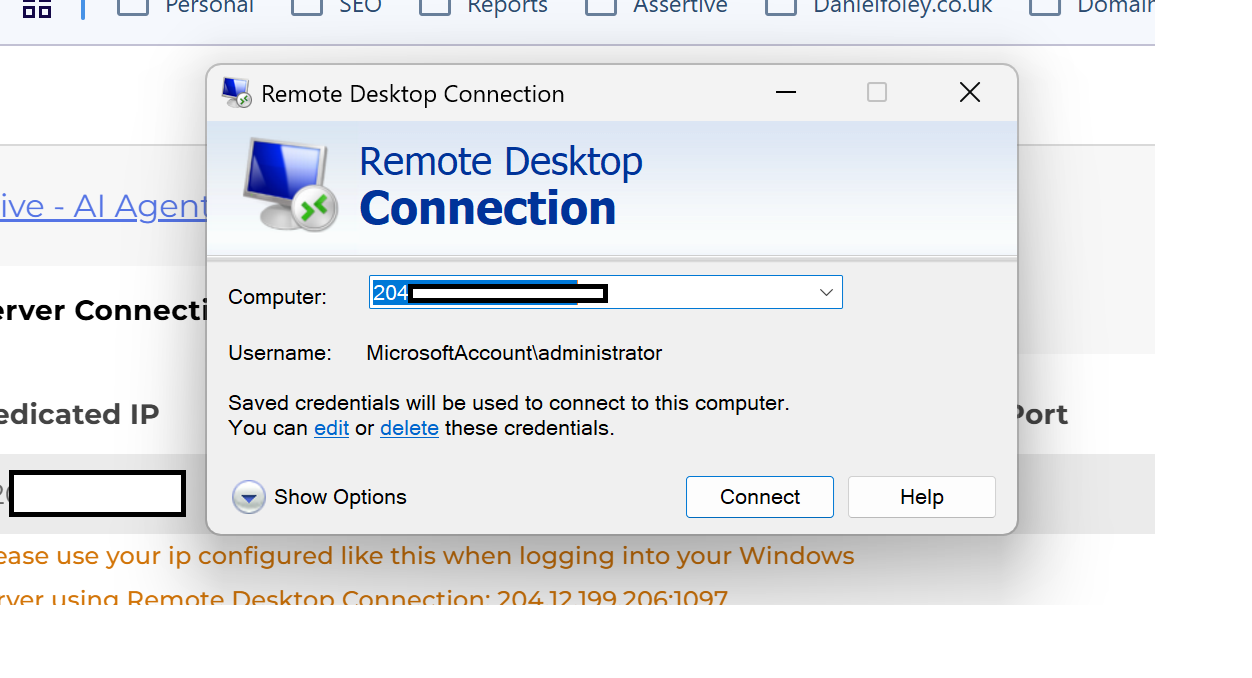
Click Connect, enter the
Administratorusername and password when prompted.Accept the certificate warning. You're now looking at the server's desktop.
On a Mac:
Install Windows App (formerly Microsoft Remote Desktop) from the Mac App Store.
Add PC, enter the IP, then the username and password.
Double-click the PC to connect.
1.3 First-login housekeeping
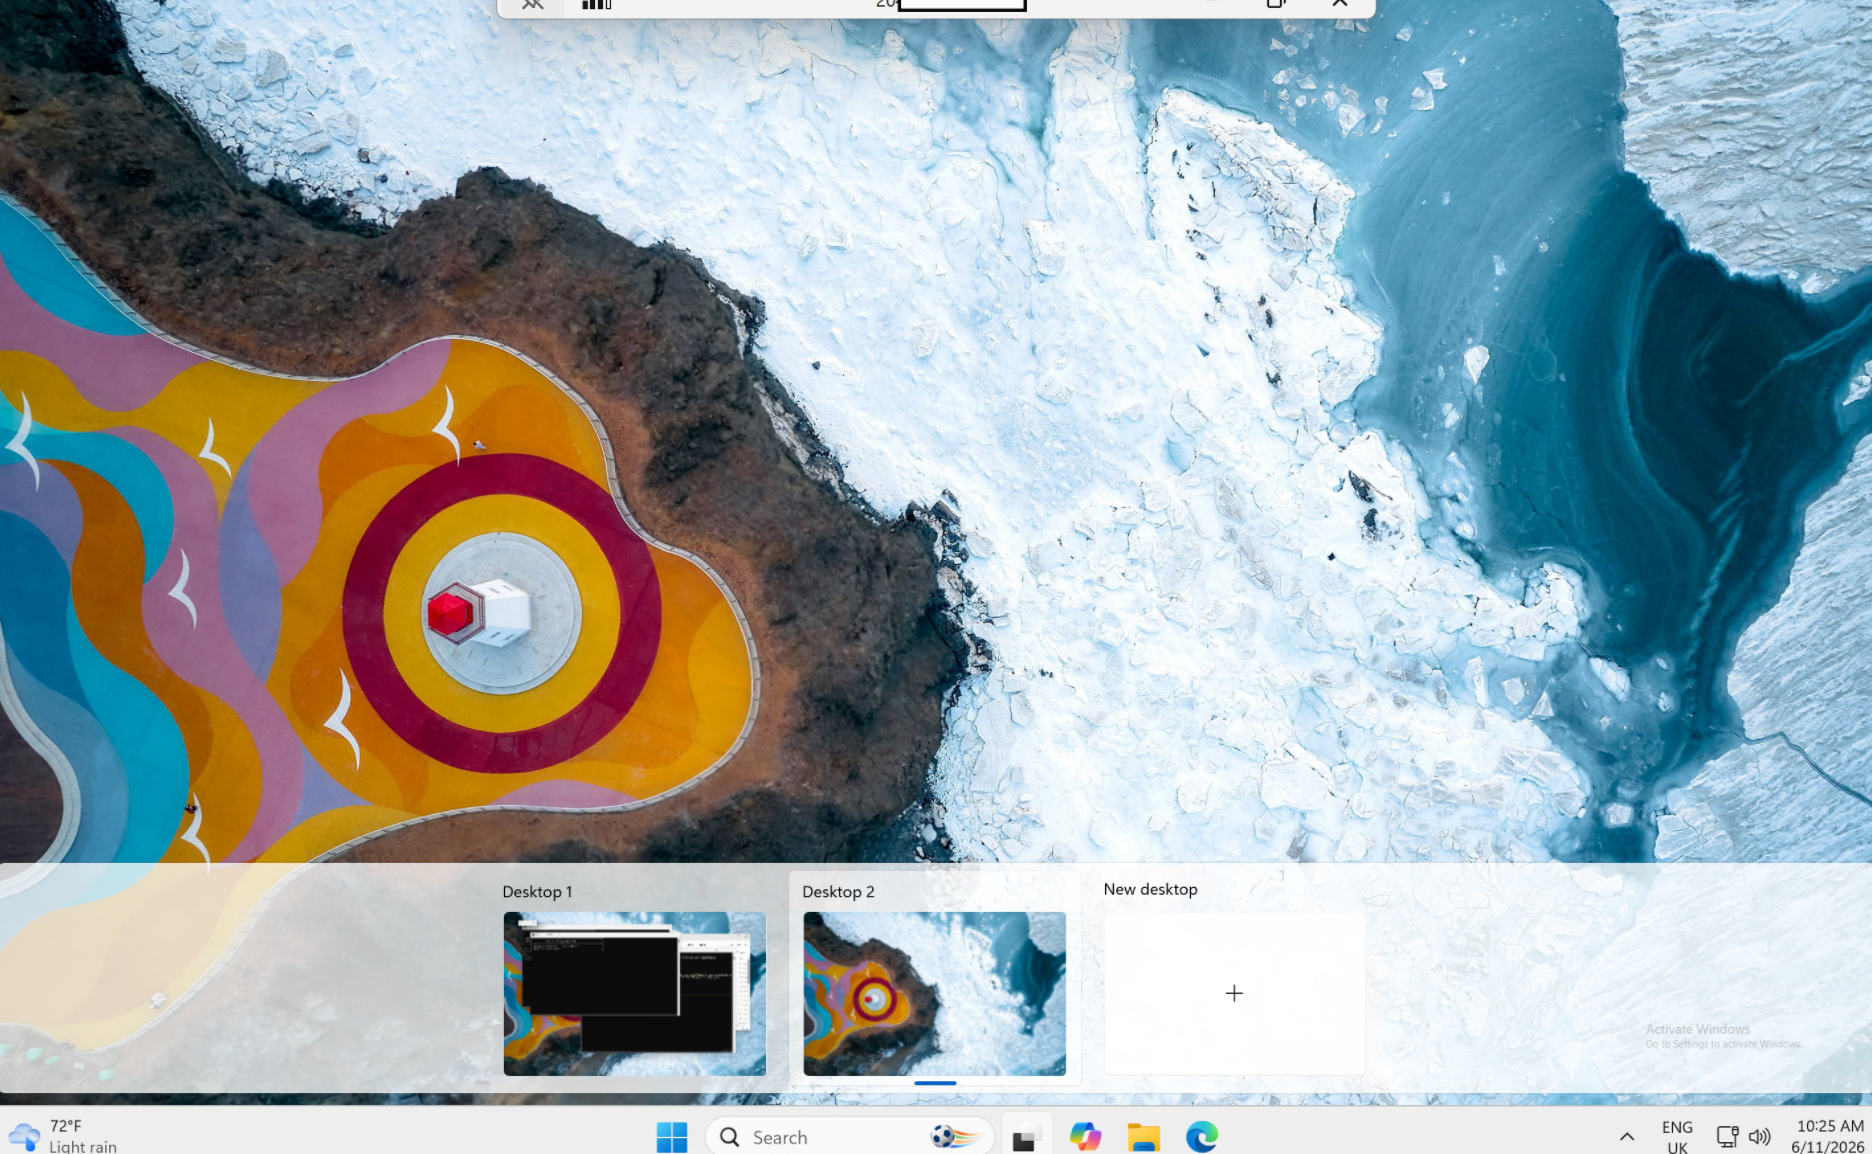
Once you're on the server desktop:
Change the administrator password to something strong if the provider gave you a default - this ISN'T essential
Open a browser on the server (it'll have Edge). You'll use it to download Hermes and to set up Slack.
Leave the server running. Don't shut it down — that's the whole point of a VPS. You just disconnect from RDP when you're done; the machine stays on.

Stage 2 - Install Hermes
You'll do everything from here on inside the RDP session, on the server.
2.1 Install via the Desktop installer (recommended on Windows)
On native Windows, the easiest path is the desktop installer. It bootstraps everything for you you do not need to install Python, Node, or Git by hand.
On the server, open the browser and go to the Hermes Agent website (hermes-agent.nousresearch.com).
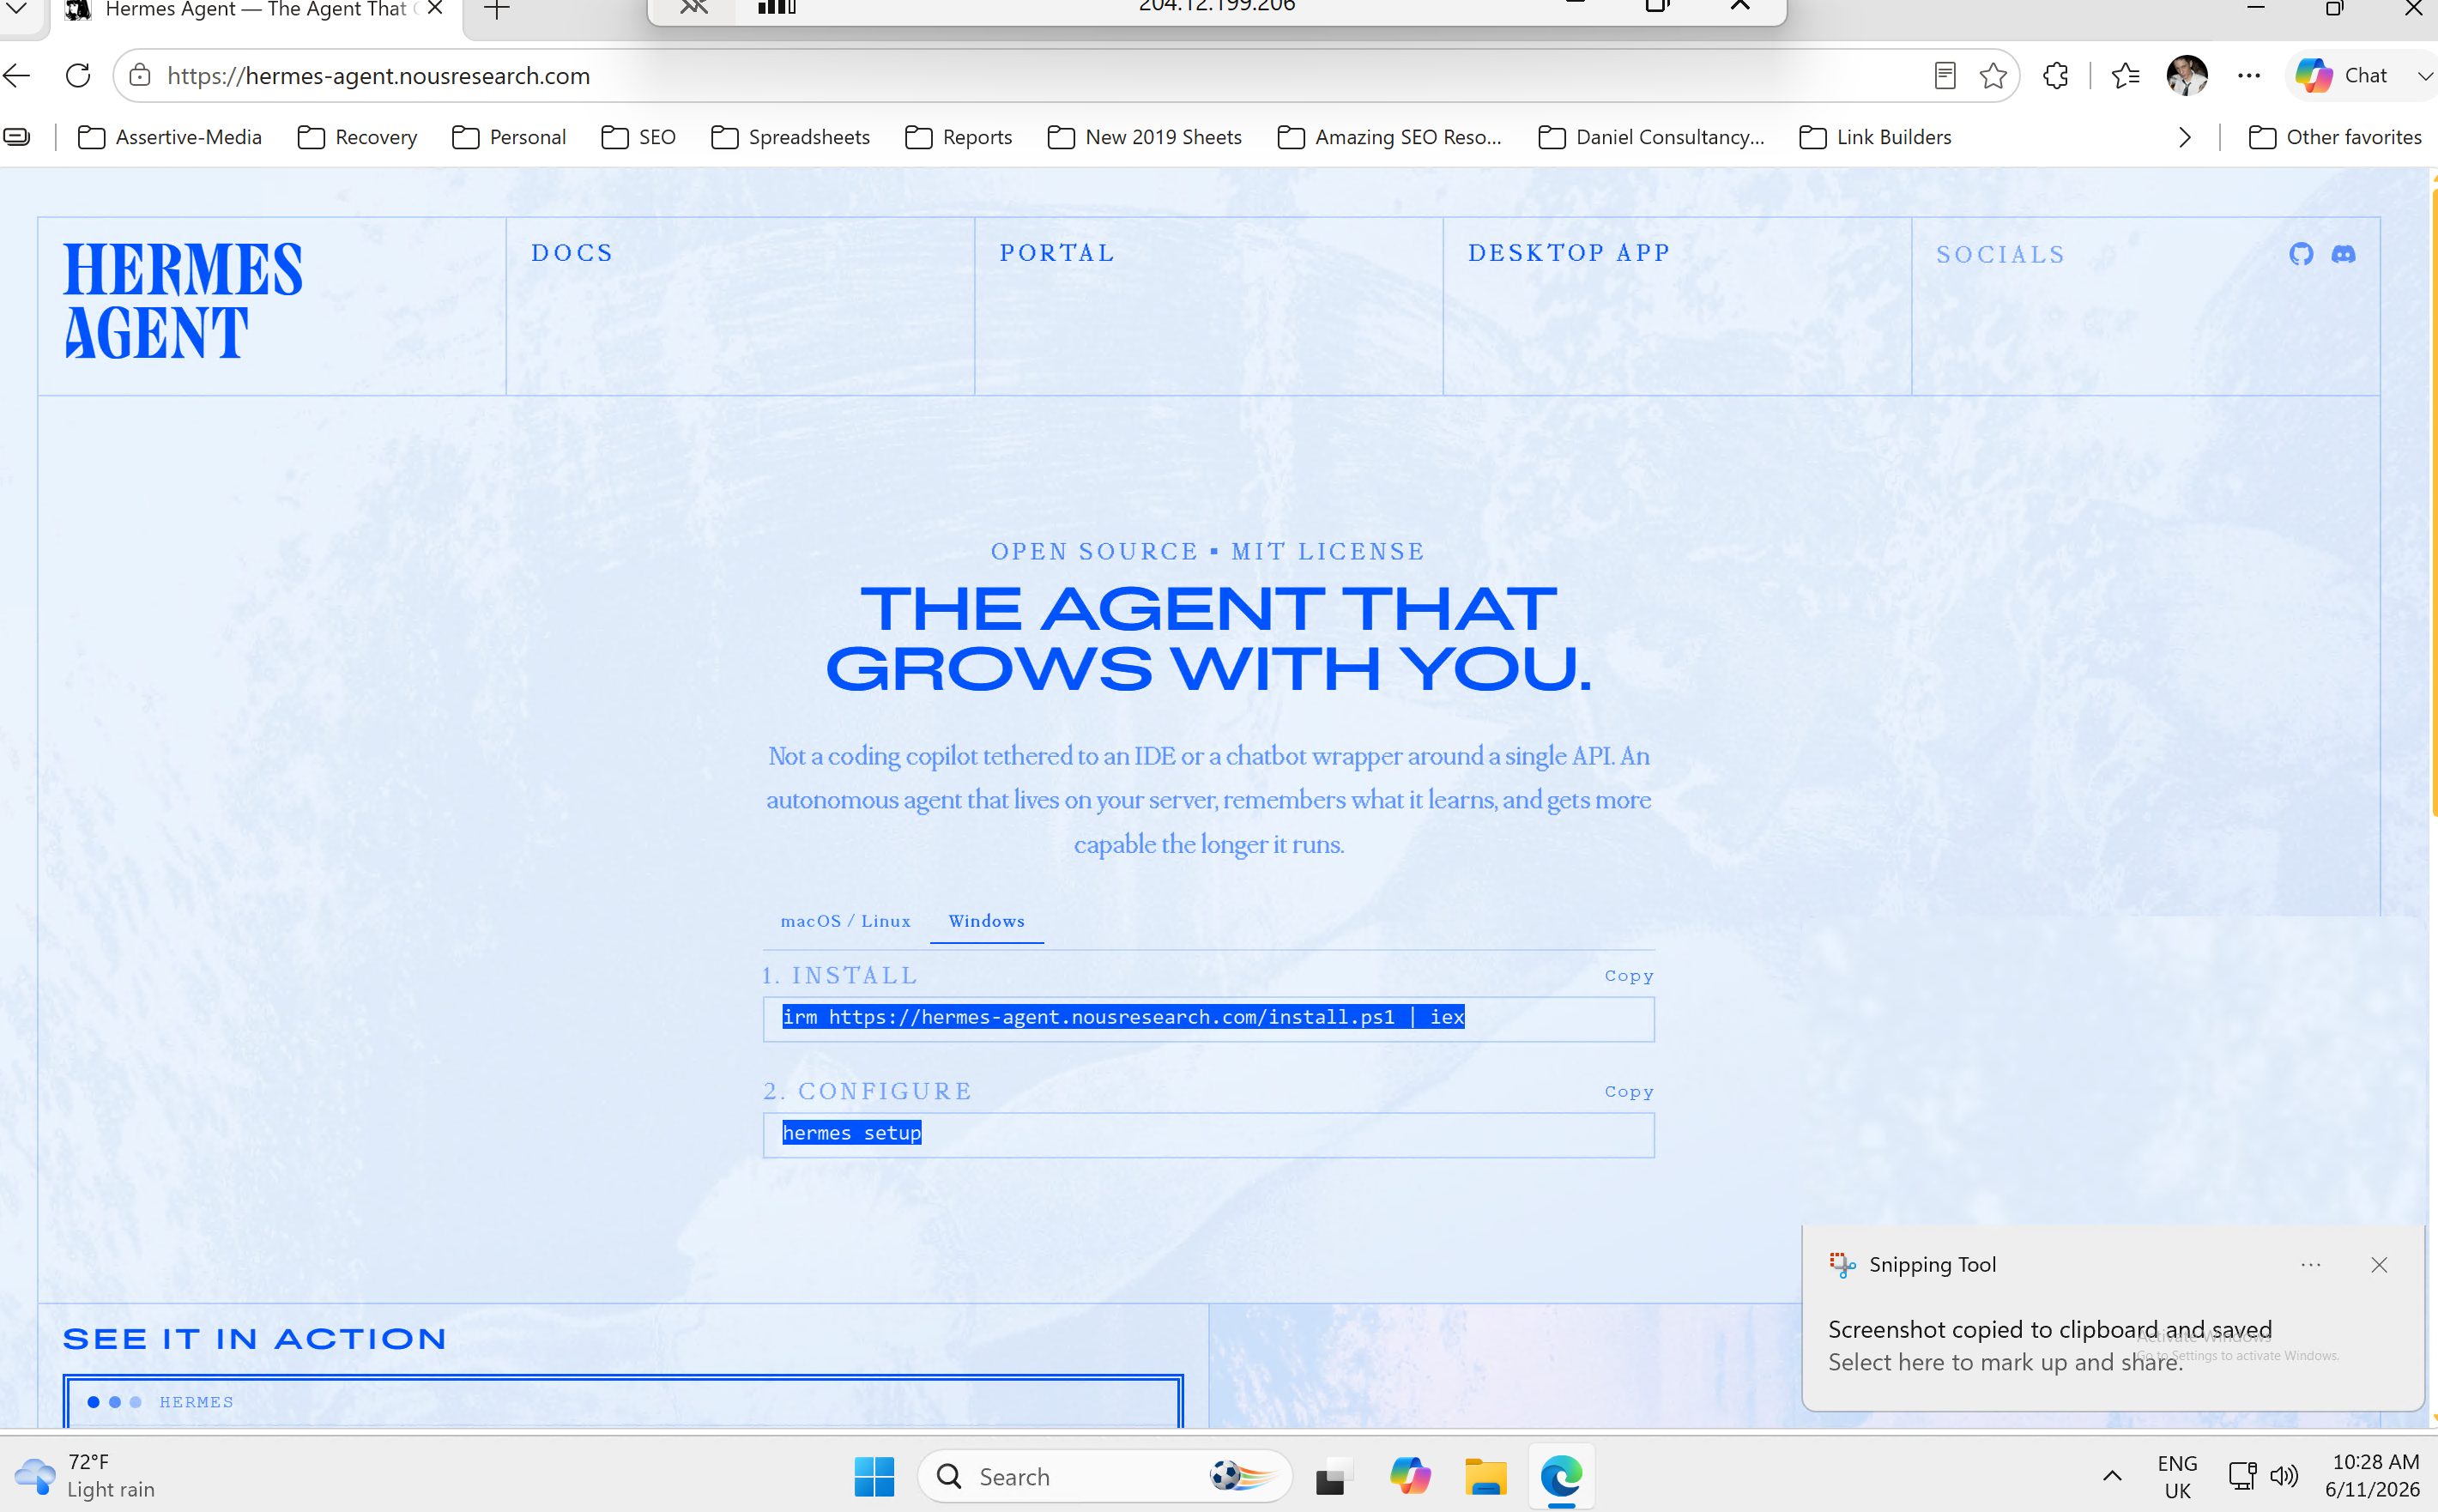
Download Hermes Desktop for Windows and run the installer.
On first launch it runs an install script under the hood that provisions Python (via uv), Node, and PortableGit, sets
HERMES_HOMEto%LOCALAPPDATA%\hermes, and adds thehermescommand to your PATH.
After it finishes, open a fresh PowerShell window (the PATH change only applies to new terminals). Test the command exists:
powershell
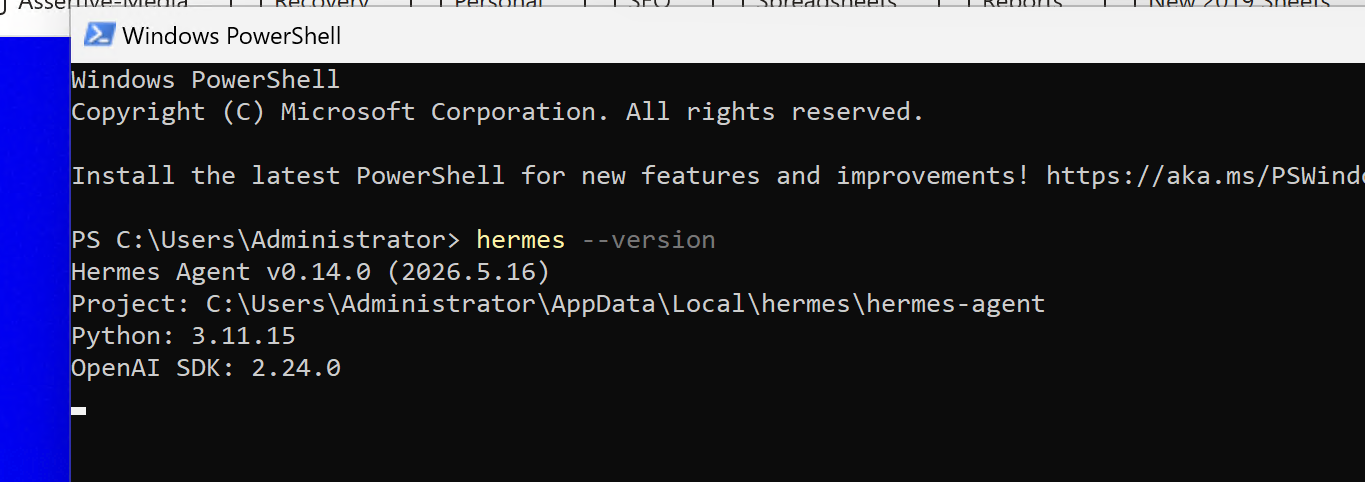
hermes --version
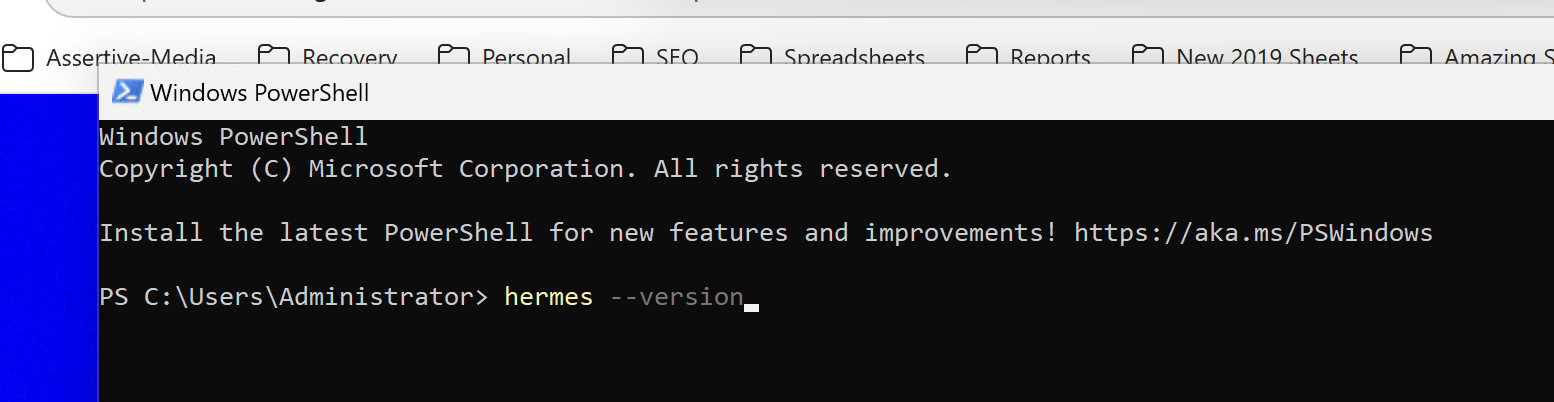
and you should see the Hermes version of what has been installed
If you'd rather do a command-line-only install without the desktop app, open PowerShell and follow the Windows install instructions on the docs site. The desktop installer is the EASIER route for a first setup.
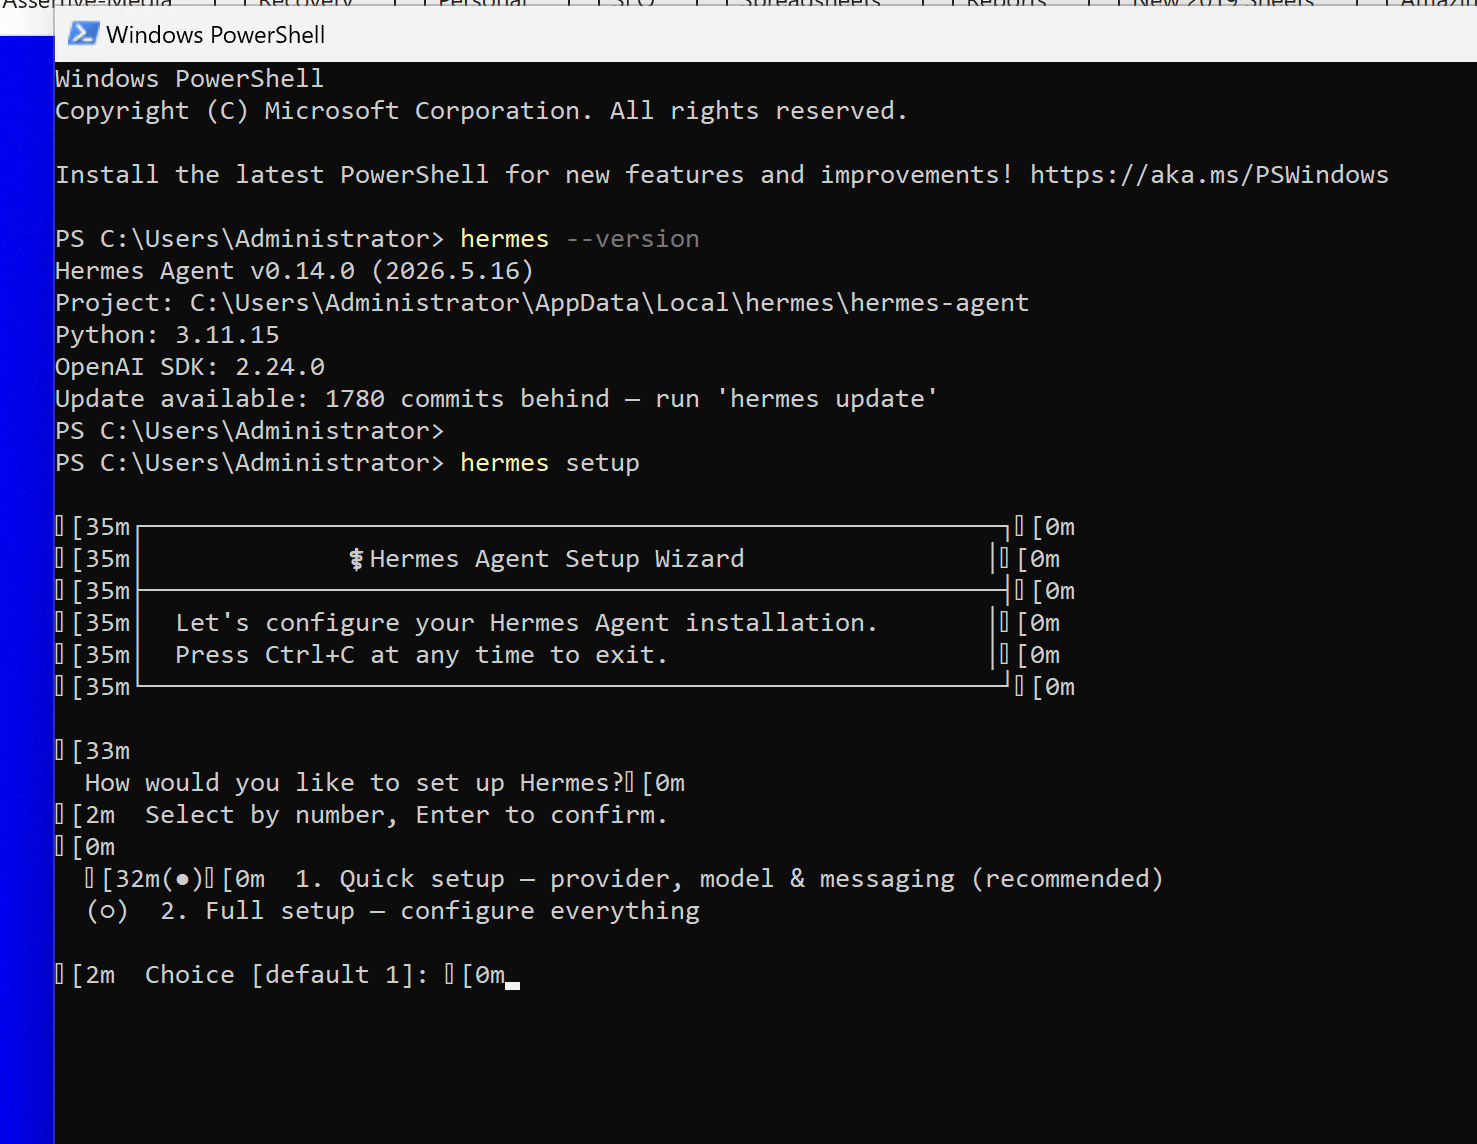
2.2 Run the setup wizard
powershell
hermes setupThis walks you through model/provider, then tools. For the model you have two sensible options:
Nous Portal — one subscription covers 300+ models plus the built-in tool gateway (web search, image generation, TTS, cloud browser) through a single login. This is the lowest-friction choice and avoids juggling per-tool API keys.
A specific provider (Anthropic, OpenAI, etc.) — paste that provider's API key when prompted. Note Hermes needs a model with at least 64,000 tokens of context; all the mainstream hosted models clear that easily.
Accept the defaults unless you have a reason to change them.
2.3 Verify the install
powershell
hermes doctorThis reports anything missing and prints the exact command to fix it. Sort any red items before moving on. A clean doctor now saves you guessing later.
2.4 Quick chat test
powershell
hermes chatSay hello, confirm it replies, then exit (/exit or Ctrl+C). If it talks, your model and keys are good and the foundation is solid.
Stage 3 - Set up the AI SEO agent
An agent in Hermes is a "profile" its own isolated home directory with its own config, secrets, memory, and personality. You can run several side by side. We'll create one called analyst.
If you only ever want one agent, you can skip creating a named profile and just configure the default one. But naming it is cleaner and lets you add more agents later.
3.1 Create the profile
powershell
hermes profile create analystThis creates %LOCALAPPDATA%\hermes\profiles\analyst\ containing config.yaml, .env, SOUL.md, and the data folders (memories, sessions, logs, skills, and so on).
If you already have a working agent and want the new one to inherit its model and keys, clone it instead:
powershell
hermes profile create analyst --clone --clone-from defaultA warning about cloning, learned the hard way: --clone copies the source .env verbatim, including any messaging tokens. If you later add new tokens by hand without removing the cloned ones, you end up with duplicate token lines and the agent silently loads the wrong (first) one. If you clone, open the new profile's .env afterwards and delete any inherited Slack/Telegram/Discord tokens before adding the new agent's own.
3.2 Set the model (optional)
If you want this agent on a specific model:
powershell
hermes -p analyst config set model.default anthropic/claude-sonnet-4-6The -p analyst flag targets this profile specifically. Use it on every command that should act on this agent rather than the default one.
3.3 Give it a personality (SOUL.md)
The SOUL.md file is the agent's identity and operating rules. Open it:
powershell
notepad %LOCALAPPDATA%\hermes\profiles\analyst\SOUL.mdWrite who the agent is, what it does, how it should behave, and any hard rules (approval gates, formatting rules, how to address you, what it must never do). Save it.
SOUL changes take effect on the next session or gateway restart, so start a fresh chat to feel them.
3.4 Test the agent in isolation
powershell
hermes -p analyst chatYou'll see an analyst banner confirming which profile is active. Check it responds in the persona you wrote, then exit. Get this right before adding tools or Slack — it isolates persona problems from plumbing problems.
Stage 4 - Connect the SEO Stack MCP
MCP (Model Context Protocol) is how the agent reaches external tools and data — here, your SEO Stack platform. Hermes speaks MCP natively and accepts remote servers via a URL.
4.1 Confirm MCP support is present
If you used the standard installer, MCP support is already included. If you did a minimal install and MCP is missing, add it from the Hermes install directory:
powershell
cd %LOCALAPPDATA%\hermes\hermes-agent
uv pip install -e ".[mcp]"
4.2 Add SEO Stack to the profile config
Open the agent's config:
powershell
notepad %LOCALAPPDATA%\hermes\profiles\analyst\config.yamlAdd an mcp_servers block (or add to it if one exists). For a remote URL-based server like SEO Stack:
yaml
mcp_servers:
seostack:
url: https://api.seo-stack.io/api/mcp
headers:
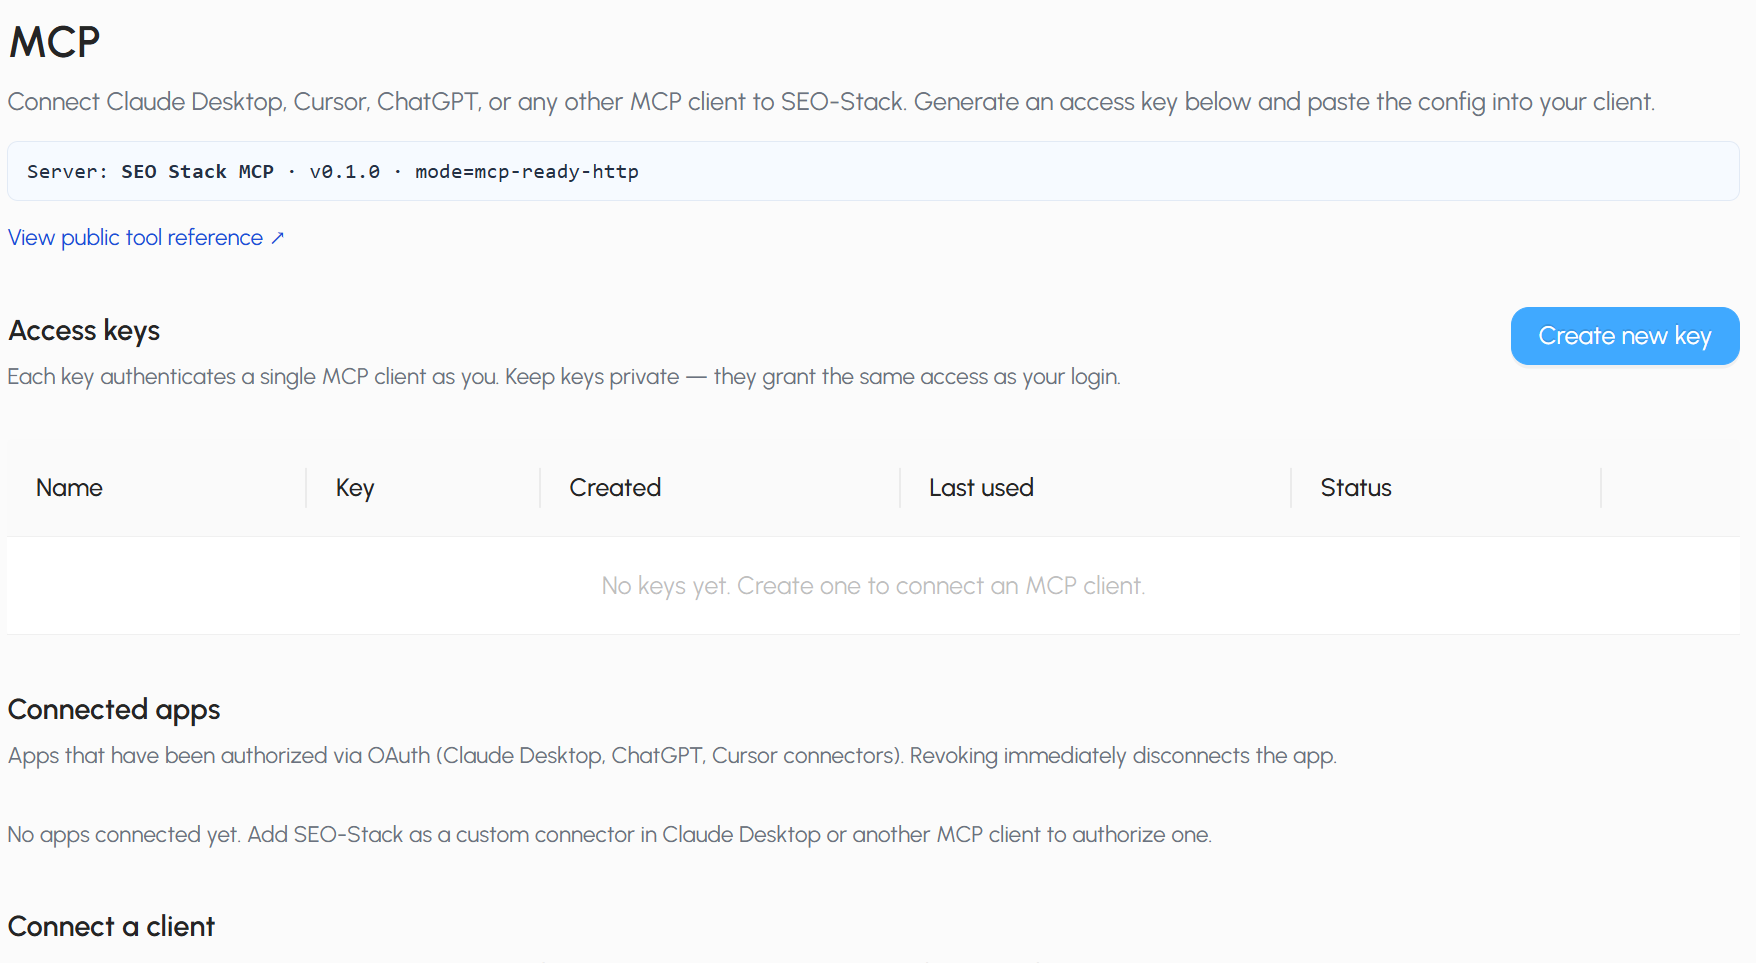
Authorization: Bearer ${MCP_SEOSTACK_API_KEY}To get your MCP API Key, login to SEO Stack and go to the MCP tool https://app.seo-stack.io/mcp and then click Create New Key >
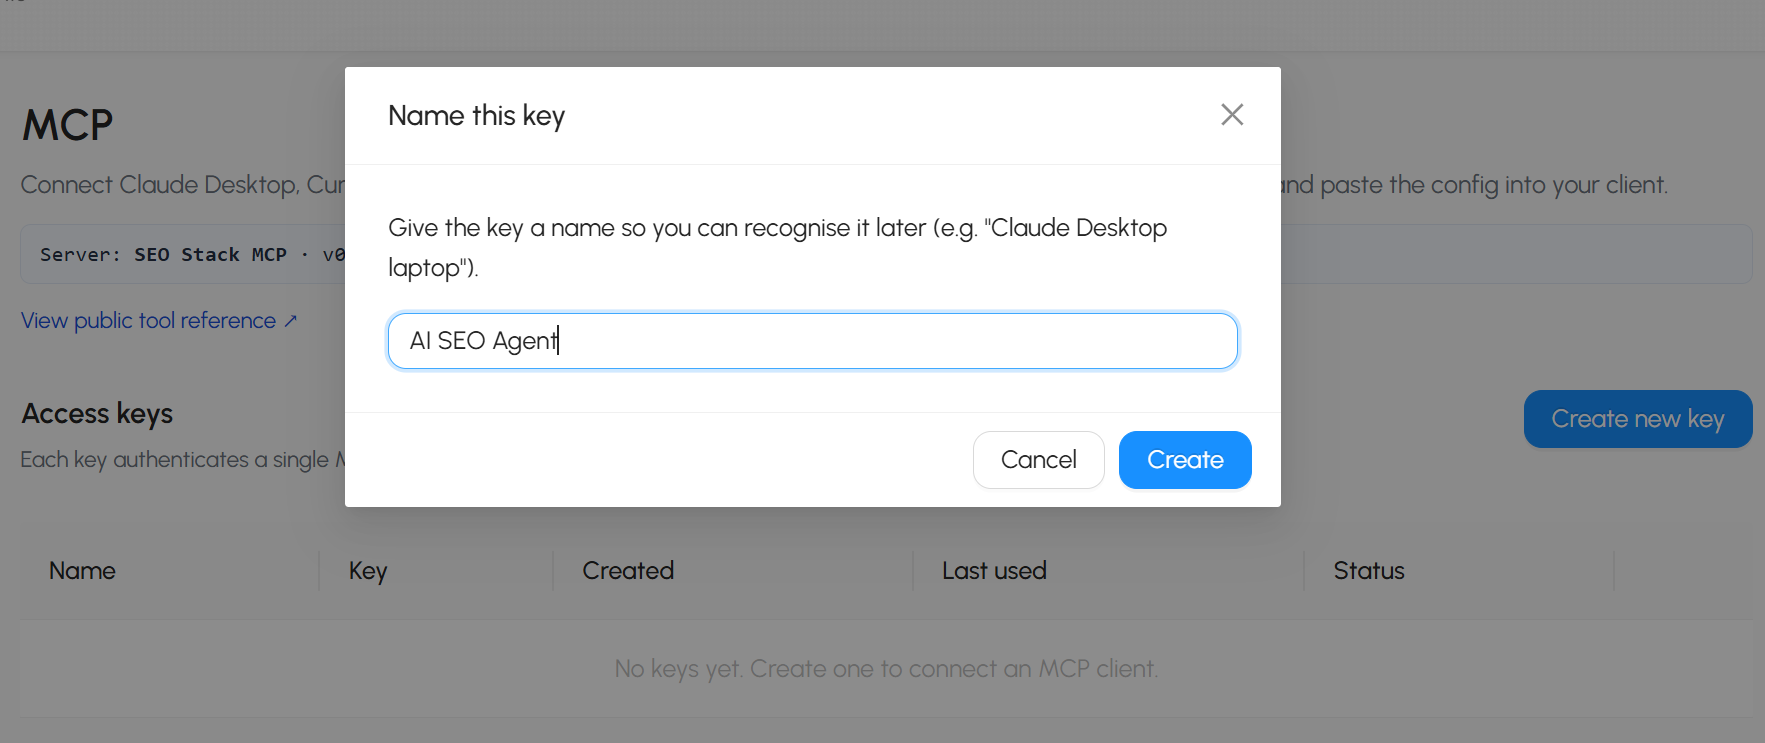
Then name your KEY something memorable i.e.
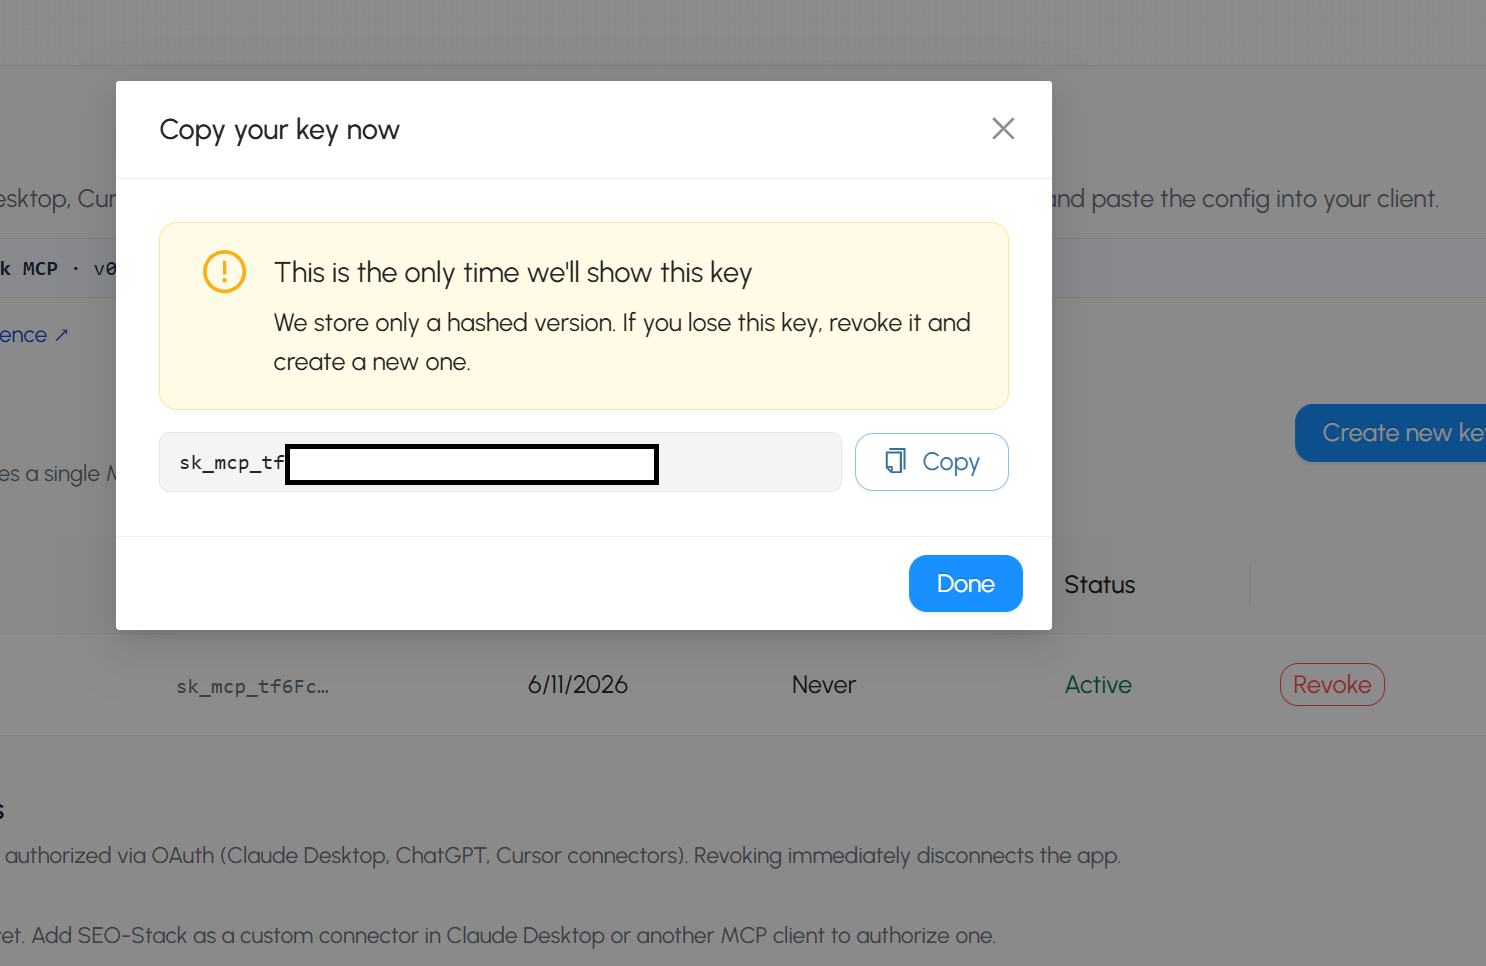
Then once you have created your key click COPY
Then go back to your config editor:
mcp_servers:
  seostack:
    url: https://api.seo-stack.io/api/mcp
    headers:
      Authorization: Bearer paste your key here
Then save the config file.
Authentication depends on how the SEO Stack MCP expects to be authorised. Two common patterns:
OAuth — add
auth: oauthunder the server. On first connect a browser window opens for you to authorise; the token is then saved and reused automatically.
yaml
  mcp_servers:
    seo_stack:
      url: "https://seostack-api-staging.admintools.cloud/api/mcp"
      auth: oauth
API key / bearer token — if SEO Stack issues you a key, it goes in the server's auth/headers config rather than
auth: oauth. Check the exact header SEO Stack expects and set it accordingly.
If you're unsure which your SEO Stack instance uses, check its MCP/API documentation or the platform's developer settings. Start with no auth or auth: oauth; the connection error at startup will tell you what it actually needs.
You can also narrow which tools are exposed with a tools: include: [...] list under the server — useful for keeping the agent's tool surface tight, but optional.
4.3 Apply and verify
MCP changes take effect on the next session or gateway restart:
powershell
hermes -p analyst gateway restartThen chat to the agent and ask it to do something only SEO Stack can answer. If the server needed OAuth, watch for the browser auth prompt on first connect. If it can't connect, the startup log names the server and the reason (see troubleshooting).
There's also an interactive catalog of Nous-reviewed MCP servers via hermes mcp if you want to add others later, but SEO Stack being your own remote server goes in config.yaml as above.
Stage 5 - Build the Slack app and connect it to the agent
This is two halves: create a Slack app (in a browser), then feed its two tokens into the agent's .env. Each agent needs its own Slack app — two agents cannot share one Slack app's tokens.
5.1 Create the Slack app
Go to api.slack.com/apps and click Create New App, then From scratch.
Name it (e.g. the agent's name), pick the workspace, create.
5.2 Enable Socket Mode (this gives you the app-level token)
Left sidebar, Settings, Socket Mode. Toggle it on.
This generates an App-Level Token starting
xapp-. Copy it somewhere safe — this is yourSLACK_APP_TOKEN. It needs theconnections:writescope (Socket Mode adds this automatically).
5.3 Add bot permissions (scopes)
Features, OAuth & Permissions, scroll to Scopes, Bot Token Scopes.
Add at least:
app_mentions:read,chat:write,channels:history,channels:read,im:history,im:read,im:write.If the agent should work in private channels too, also add
groups:read(andgroups:history). Leaving these out produces amissing_scopewarning later.
5.4 Subscribe to events
Features, Event Subscriptions. Toggle on.
Under Subscribe to bot events, add
app_mention(so it hears @-mentions in channels) andmessage.im(so it hears direct messages). Withoutmessage.im, DMs go nowhere.
5.5 Turn on the Messages tab
Features, App Home.
Under Show Tabs, enable the Messages Tab, and tick "Allow users to send Slash commands and messages from the messages tab." If this is off, Slack greys out the input box with "sending messages to this app has been turned off."
5.6 Install the app (this gives you the bot token)
Settings, Install App (or OAuth & Permissions), Install to Workspace, authorise.
This produces the Bot User OAuth Token starting
xoxb-. Copy it — this is yourSLACK_BOT_TOKEN.
Important: any time you change scopes or events after installing, you must Reinstall to Workspace for the change to take effect.
You now have two tokens: xoxb-... (bot) and xapp-... (app-level).
5.7 Put the tokens into the agent's .env
powershell
notepad %LOCALAPPDATA%\hermes\profiles\analyst\.envFind the Slack section. The template lines are commented out with a leading # — those are examples, not live settings. Add live lines (no #) with your real tokens:
SLACK_BOT_TOKEN=xoxb-your-real-bot-token
SLACK_APP_TOKEN=xapp-your-real-app-token
Make sure there's only one of each line and no leftover commented-out duplicate carrying a different value above it.
5.8 Restrict who can talk to it (recommended)
Add your own Slack user ID so the agent only responds to you (and anyone else you list):
SLACK_ALLOWED_USERS=<your-slack-user-id>To find your Slack user ID: in Slack, click your profile, the three-dot menu, Copy member ID. It looks like U0XXXXXXX. If you skip this line the agent may respond to anyone; if you set it to the wrong ID, the agent will silently drop your messages as "unauthorized user."
Save and close the file.
5.9 Start the gateway
On Windows, the first time you start a gateway it offers to install an auto-start scheduled task and may ask for a UAC (admin) prompt — approve it so the agent comes back after a reboot.
powershell
hermes -p analyst gateway restartNote: because the messaging SDK is auto-installed based on the tokens being present in .env, the very first start after adding Slack tokens may take a moment longer while it installs the Slack library.
5.10 Confirm it connected, then test
powershell
type %LOCALAPPDATA%\hermes\profiles\analyst\logs\gateway-stdio.logYou want to see Slack connecting cleanly — not a "placeholder token," "token already in use," or "missing_scope" error. Then open Slack, DM the bot or @-mention it in a channel it's been invited to, and it should reply in your agent's persona.
If it's in a shared workspace, double-check which channels the bot is invited to before it starts auto-responding around colleagues or clients.
Ready to transform your SEO?
Join thousands of SEO professionals using SEO Stack to get better results.
Start Free 30 Day Trial